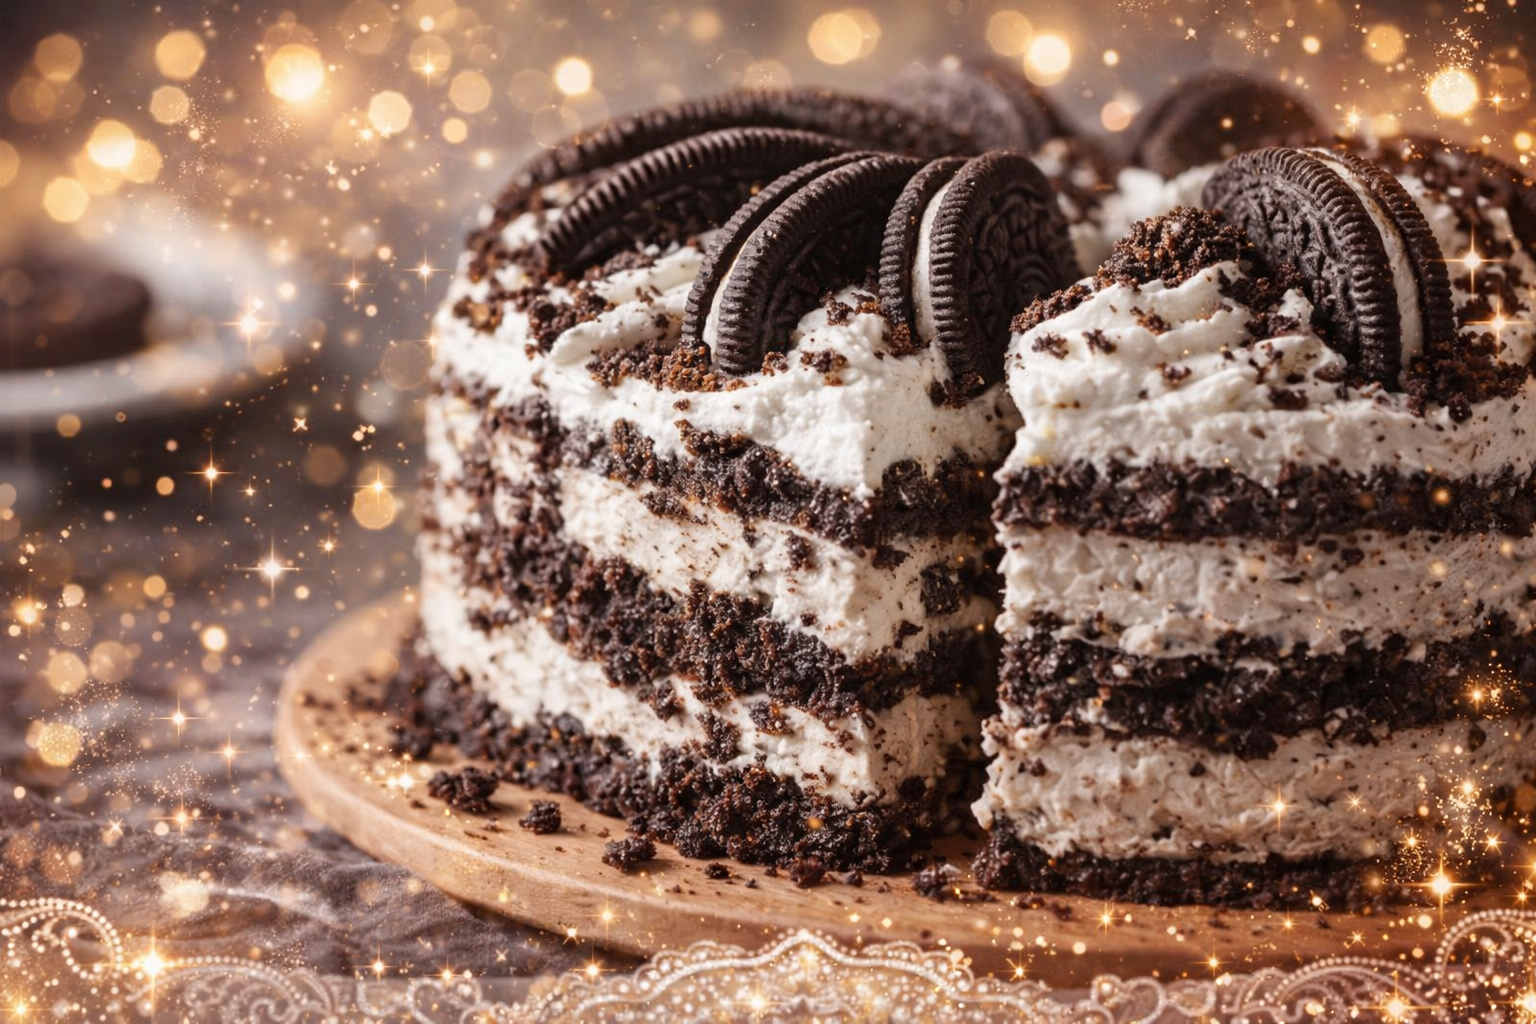
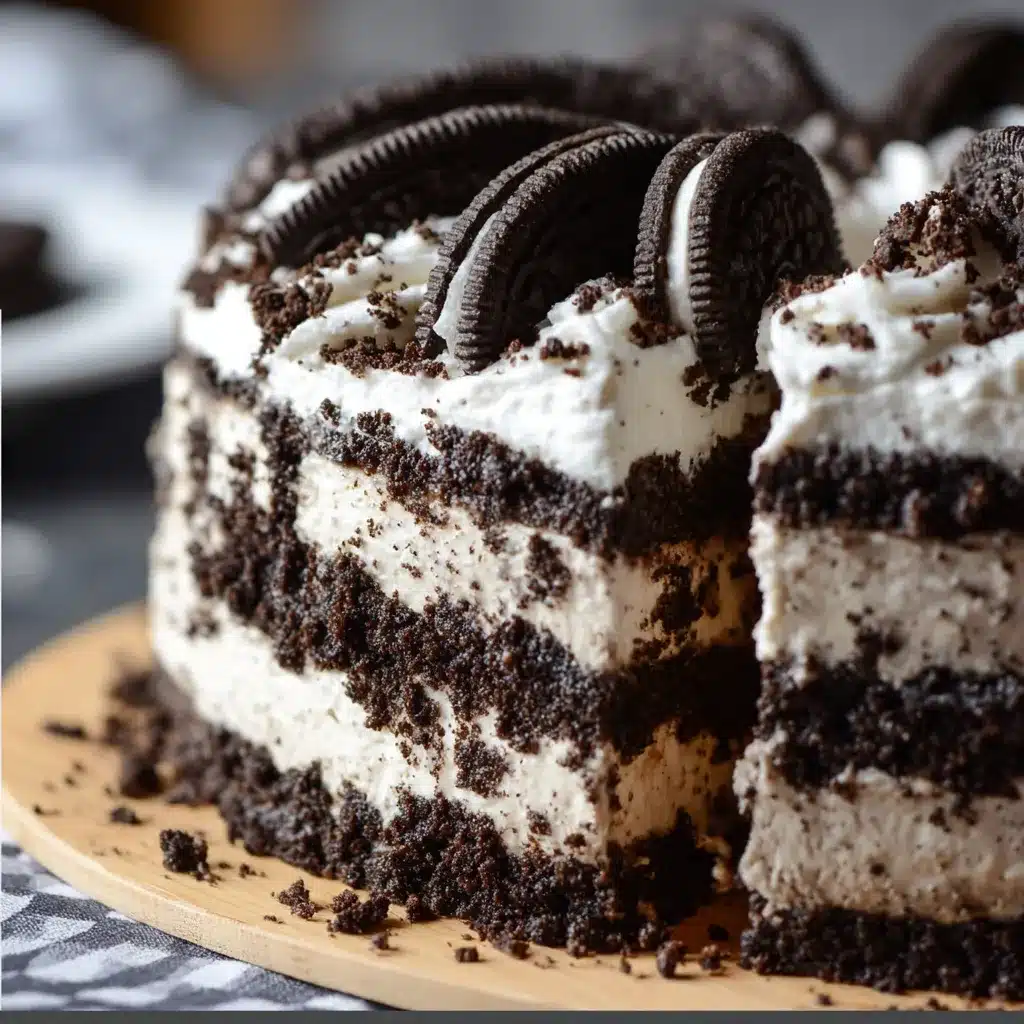
If there’s ever been a dessert that feels like pure joy in every bite, it’s this No-Bake Oreo Cake. With its layers of crushed cookies, fluffy cream cheese filling, and light-as-air whipped cream, it’s the kind of treat that makes everyone ask for seconds. I first made this recipe on a chilly afternoon when I didn’t feel like turning on the oven, and it’s been a family favorite ever since. It’s indulgent yet incredibly easy — a perfect make-ahead dessert that looks as good as it tastes. Whether you’re celebrating something special or just craving a little sweetness, this no-bake beauty is guaranteed to impress.
Why You’ll Love This Recipe
Rich and Fudgy Texture
What makes this No-Bake Oreo Cake so irresistible is the contrast of textures. The crushed Oreo crust forms a chewy, cookie-crumb base that perfectly supports the velvety smooth cream cheese filling. The whipped cream adds a light, cloud-like texture that balances every bite. It’s rich, creamy, and a little nostalgic — like dunking Oreos in cold milk but turned into a slice of heaven.
Recipes like Live Well Bake Often and The Pioneer Woman also celebrate this dreamy texture, reminding us that no-bake desserts can be just as decadent as baked ones. And as Sugar & Sparrow puts it, every bite brings that “milk-dunked Oreo” nostalgia to life — a perfect mix of comfort and indulgence.
Simple Ingredients
The beauty of this dessert is in its simplicity. You don’t need fancy tools or specialty ingredients — just a handful of everyday staples you probably already have in your kitchen.
-
Oreos bring that unmistakable cookies-and-cream flavor.
-
Heavy cream adds fluff and structure.
-
Powdered sugar sweetens and stabilizes.
-
Butter binds the crust.
-
Cream cheese adds tang and richness.
-
Sweetened condensed milk delivers a creamy sweetness.
-
Vanilla extract enhances every flavor note.
As noted by Sugar & Sparrow, many no-bake Oreo desserts come together with just four to six simple ingredients — proof that amazing desserts don’t have to be complicated.
Ease of Preparation
This No-Bake Oreo Cake is every home baker’s dream — there’s no oven required, just a little mixing, layering, and chilling. The process is straightforward and stress-free, making it perfect even for beginners. You simply mix crushed Oreos with melted butter for the crust, beat the cream cheese and sweetened condensed milk for the filling, fold in the whipped cream, and let the fridge do all the magic.
This method comes from the old-fashioned icebox cake tradition — a beloved no-bake dessert style where layers of cookies and cream set in the refrigerator to perfection (Wikipedia). In total, you’ll spend only 20 minutes prepping, then let it chill for at least 4 hours (or overnight) for a perfectly set, silky finish.
Customizability
One of the most delightful things about this recipe is how flexible it is. You can easily make it your own — swap classic Oreos for Golden, Mint, or even Birthday Cake flavors for a fun twist. Stir in peanut butter chips or drizzle chocolate ganache on top for an extra treat. For those with dietary needs, opt for gluten-free cookies or dairy-free cream alternatives.

Subscribe to Creatives Cookery!
Get updates on the latest posts and more from Creatives Cookery straight to your inbox.
We use your personal data for interest-based advertising, as outlined in our Privacy Notice.
As The Busy Baker points out, the possibilities for no-bake Oreo desserts are endless. That’s the beauty of it — once you master the base, you can personalize it to suit any craving or occasion.
Ingredients
Full List of Ingredients
Here’s everything you’ll need to make your No-Bake Oreo Cake, along with how each ingredient works its magic:
-
36 Oreo cookies (crushed): Forms the chewy, chocolatey crust and gives that classic cookies-and-cream crunch.
-
2 cups heavy whipping cream: Whips up light and fluffy, creating the smooth body of the filling.
-
½ cup powdered sugar: Sweetens the whipped cream and helps it hold its shape.
-
¼ cup unsalted butter (melted): Binds the crushed Oreos into a cohesive crust that holds its form when sliced.
-
1 teaspoon vanilla extract: Adds a subtle warmth and depth to balance the sweetness.
-
8 ounces cream cheese (softened): Brings creamy tang and structure to the filling.
-
½ cup sweetened condensed milk: Infuses the filling with silky richness and a touch of caramel-like sweetness.
-
1 cup crushed Oreos (for filling): Adds delightful bits of cookie texture inside the creamy layer.
-
½ cup mini Oreos (for garnish): The final touch — a playful, eye-catching decoration that adds crunch and charm.
Each ingredient plays its part in creating that perfect balance — rich yet airy, sweet yet slightly tangy, creamy yet crisp. Together, they make a dessert that feels indulgent but comes together with effortless ease.
How to Make No-Bake Oreo Cake
Step-by-Step Instructions
Making this No-Bake Oreo Cake is a total breeze — no oven, no stress, and no fancy techniques required. Just a few bowls, a mixer, and a bit of chill time. Follow these easy steps and you’ll have a creamy, cookies-and-cream masterpiece ready to impress.
1. Prepare the Crust
Start by crushing 36 Oreo cookies until they’re fine crumbs. You can do this using a food processor or by placing them in a zip-top bag and gently pounding them with a rolling pin — a fun stress-reliever!
Pour in ¼ cup of melted unsalted butter, mixing until the crumbs are evenly moistened and resemble damp sand. This butter-and-cookie blend will hold together beautifully to form the crust.
Press the mixture firmly into the bottom of a springform pan (about 8 or 9 inches wide). Use the bottom of a glass or measuring cup to smooth and compact the crust evenly. A uniform crust helps your cake hold its shape later.
Pop it into the fridge for 15 minutes to chill and set. Chilling solidifies the butter, giving you a firm base that won’t crumble when sliced — an essential step for that picture-perfect foundation.
Tip: Line the bottom of your pan with parchment paper for effortless removal once your cake is set.
2. Make the Whipped-Cream Base
In a large, chilled mixing bowl, pour 2 cups of heavy whipping cream. Add ½ cup powdered sugar and 1 teaspoon vanilla extract.
Using an electric mixer, whip the mixture on medium-high speed until stiff peaks form — this means the cream holds its shape when you lift the beaters. The colder your cream and bowl, the faster it will whip and the fluffier it will be.
This airy whipped cream will later lighten the cream-cheese filling, giving your dessert that melt-in-your-mouth texture.
Tip: Avoid over-beating! If your cream starts to look grainy, you’ve gone too far. Stop when it’s soft but stable.
3. Create the Cream-Cheese Filling
In another large bowl, beat 8 oz of softened cream cheese until smooth and lump-free. Room-temperature cream cheese is key here — it ensures a silky filling without any tiny clumps.
Add ½ cup sweetened condensed milk, mixing until creamy and well blended. The condensed milk adds a luscious sweetness and that signature velvety texture that no-bake cakes are famous for.
Scrape down the sides of the bowl as you go — a simple step that keeps everything consistent.
4. Fold the Whipped Cream into the Cream-Cheese Mixture
Now comes the fun part: combining the two.
Using a spatula, gently fold the whipped cream into the cream-cheese mixture in two or three additions. Take your time — you want to preserve as much of the airiness from the whipped cream as possible.
Once fully incorporated, stir in 1 cup of crushed Oreos to add delightful cookie bits throughout the creamy filling. These tiny bursts of crunch make every bite more exciting.
Tip: Always fold, never stir vigorously. Gentle folding keeps the filling light and fluffy.
5. Assemble the Cake
Remove your crust from the fridge. Pour the Oreo-studded cream filling evenly over the crust, smoothing the top with a spatula or offset knife for a clean finish.
Tap the pan lightly on the counter to release any air bubbles and ensure the filling settles evenly. The surface should look smooth and glossy — it’s already gorgeous, but just wait until it sets!
Tip: If you want neat edges when unmolding later, run a clean knife around the inside edge of the pan before chilling.
6. Chill
Transfer the assembled cake to the refrigerator and let it chill for at least 4 hours, though overnight is even better.
Chilling is what transforms this mixture from creamy to sliceable perfection. It allows the butter in the crust to firm up and the cream-cheese filling to stabilize. During this time, all the flavors meld beautifully, creating that irresistible “cookies-and-cream” harmony.
Resist the temptation to dig in early — patience pays off here!
7. Garnish & Serve
Before serving, remove the cake from the pan. If it sticks slightly, run a warm knife along the sides for a clean release.
Decorate the top with mini Oreos or a sprinkle of extra crushed Oreos for a touch of whimsy. The black-and-white contrast makes this dessert visually stunning with minimal effort.
Use a sharp knife dipped in hot water (and wiped clean between cuts) to slice the cake neatly. Serve chilled, and watch it disappear faster than you can say “no-bake.”
Tip: If you’re hosting, garnish just before serving to keep the mini Oreos crisp and picture-perfect.
What to Serve with This Recipe
 100vw, 1024px” data-lazy-src=”https://creativescookery.com/wp-content/uploads/2025/10/No-Bake-Oreo-Cake-4.webp” /></p>
<div id=)
Subscribe to Creatives Cookery!
Get updates on the latest posts and more from Creatives Cookery straight to your inbox.
We use your personal data for interest-based advertising, as outlined in our Privacy Notice.
 100vw, 1024px” data-lazy-src=”https://creativescookery.com/wp-content/uploads/2025/10/No-Bake-Oreo-Cake-2.webp” /></p>
<h3 data-start=) Room Temperature Storage
Room Temperature Storage