When it comes to comfort food, pizza sits at the very top of the list for many people. But if you’ve ever craved pizza in a smaller, hand-held form that still packs the same cheesy, saucy, and satisfying punch, then Stuffed Crust Pizza Snacks are the perfect solution. These bite-sized delights combine everything we love about pizza — gooey cheese, tangy tomato sauce, savory toppings, and that signature stuffed crust — but in a fun, snackable form.
Whether you’re planning a party, looking for a family-friendly weeknight dinner, or just craving a cheesy treat to pair with movie night, these snacks will become a go-to recipe in your kitchen.
This recipe will walk you through every detail — from making the dough, creating the perfect stuffed crust, assembling, baking, and serving — as well as pro tips to make them even more delicious.
Why You’ll Love These Stuffed Crust Pizza Snacks
-
Perfectly Snackable: Small enough to enjoy as an appetizer or side dish, but satisfying enough for a main meal.
-
Customizable: You can fill them with your favorite toppings — pepperoni, sausage, veggies, or even chicken.
-
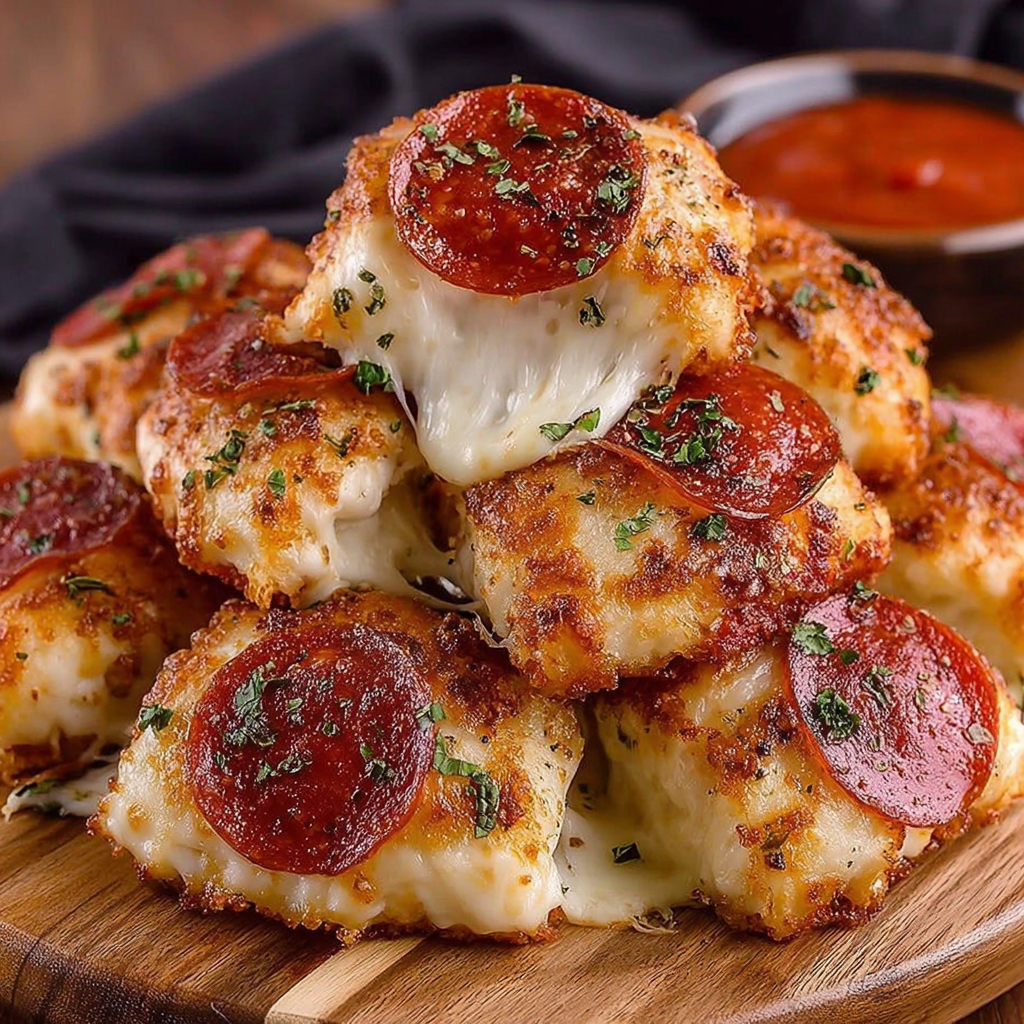
Cheesy Goodness: The crust is stuffed with mozzarella sticks or string cheese for a gooey surprise in every bite.
-
Kid-Friendly: A guaranteed hit with kids since it’s like pizza rolls but way more flavorful and homemade.
-
Make-Ahead Friendly: You can prep them in advance, freeze, and bake later for convenience.
Ingredients for Stuffed Crust Pizza Snacks
This recipe makes about 24 snack-sized pizzas.
For the Dough:
-
3 ½ cups (440 g) all-purpose flour
-
1 packet (2 ¼ tsp) instant yeast
-
1 tsp sugar
-
1 tsp salt
-
1 ¼ cups warm water (about 110°F / 43°C)
-
2 tbsp olive oil
For the Pizza Sauce:
-
1 cup (250 g) tomato sauce (or marinara)
-
2 tbsp tomato paste
-
2 cloves garlic, minced
-
1 tbsp olive oil
-
1 tsp dried oregano
-
1 tsp dried basil
-
½ tsp onion powder
-
½ tsp sugar
-
Salt and pepper to taste
For the Stuffed Crust Filling:
-
6 mozzarella string cheese sticks (cut into small 1-inch pieces)
OR -
1 block of mozzarella cut into ½-inch cubes
For the Pizza Snack Assembly:
-
1 ½ cups shredded mozzarella cheese
-
½ cup mini pepperoni slices (or regular pepperoni chopped small)
-
½ cup cooked sausage crumbles (optional)
-
½ cup diced bell peppers
-
½ cup mushrooms, finely chopped
-
¼ cup black olives, sliced (optional)
-
Olive oil for brushing
-
2 tbsp grated Parmesan cheese
-
1 tsp Italian seasoning
Step-by-Step Instructions
Step 1: Make the Dough
-
In a large mixing bowl, combine warm water, sugar, and yeast. Let sit for 5 minutes until foamy.
-
Add olive oil, flour, and salt. Mix until dough forms.
-
Knead on a floured surface for 7–10 minutes until smooth and elastic.
-
Place the dough in a greased bowl, cover, and let rise in a warm place for 1–1 ½ hours, or until doubled in size.
Step 2: Prepare the Pizza Sauce
-
Heat olive oil in a small saucepan over medium heat.
-
Add garlic and sauté for 1 minute until fragrant.
-
Stir in tomato sauce, tomato paste, oregano, basil, onion powder, sugar, salt, and pepper.
-
Simmer for 10 minutes, stirring occasionally. Remove from heat and set aside.
Step 3: Shape the Dough into Snack Bases
-
Once dough is ready, punch it down and divide into 24 equal portions.
-
Roll each portion into a small ball, then flatten into a 3–4 inch circle.
Step 4: Stuff the Crust
-
Place one mozzarella cube in the center of each dough circle.
-
Fold the dough edges over the cheese and pinch closed.
-
Flatten slightly to create a mini pizza base with hidden cheese inside.
Step 5: Assemble the Snacks
-
Place the stuffed dough rounds on a parchment-lined baking sheet.
-
Spread 1 tsp of pizza sauce on top of each.
-
Sprinkle with shredded mozzarella cheese.
-
Add toppings of choice: pepperoni, sausage, veggies, olives, etc.
-
Brush exposed dough edges with olive oil and sprinkle with Parmesan + Italian seasoning.
Step 6: Bake
-
Preheat oven to 425°F (220°C).
-
Bake the snacks for 12–15 minutes, or until golden brown and bubbly.
-
Let cool slightly before serving.
Preparation & Cooking Time
-
Prep Time: 30 minutes (plus 1–1 ½ hours rising time)
-
Cooking Time: 15 minutes
-
Total Time: About 2 hours
Serving Suggestions
-
Serve warm with extra marinara or garlic butter dipping sauce.
-
Pair with a side salad for a light meal.
-
Perfect for game nights, parties, or kids’ lunchboxes.
Storage & Reheating
-
Store leftovers in an airtight container in the refrigerator for up to 3 days.
-
Reheat in the oven at 350°F (175°C) for 8–10 minutes to maintain crispiness.
-
Can be frozen (unbaked or baked) for up to 2 months. Reheat straight from freezer.
Nutritional Information (Per Snack – approx.)
-
Calories: 130–150
-
Carbs: 15 g
-
Protein: 6 g
-
Fat: 6 g
-
Sodium: 220 mg
(Values vary depending on toppings used.)
Tips & Variations
-
Cheese Lovers’ Version: Use a mix of mozzarella, cheddar, and provolone for extra cheesiness.
-
Spicy Kick: Add sliced jalapeños or sprinkle red chili flakes on top before baking.
-
Meat Feast: Load with mini pepperoni, sausage, and even bacon bits.
-
Veggie Delight: Use mushrooms, onions, peppers, spinach, and olives.
-
Garlic Butter Glaze: Brush baked snacks with garlic butter for irresistible flavor.
-
Make it Healthier: Use whole wheat flour and light cheese for a lighter version.
Why This Recipe Works
The beauty of these Stuffed Crust Pizza Snacks lies in their balance of textures and flavors: the chewy homemade dough, melty cheese hiding inside, and customizable toppings on top. Baking at a high temperature ensures the crust turns golden and crispy while keeping the interior soft and gooey.
These snacks are essentially mini stuffed crust pizzas, making them the best of both worlds — all the joy of pizza night, but with a fun twist that keeps people coming back for more.