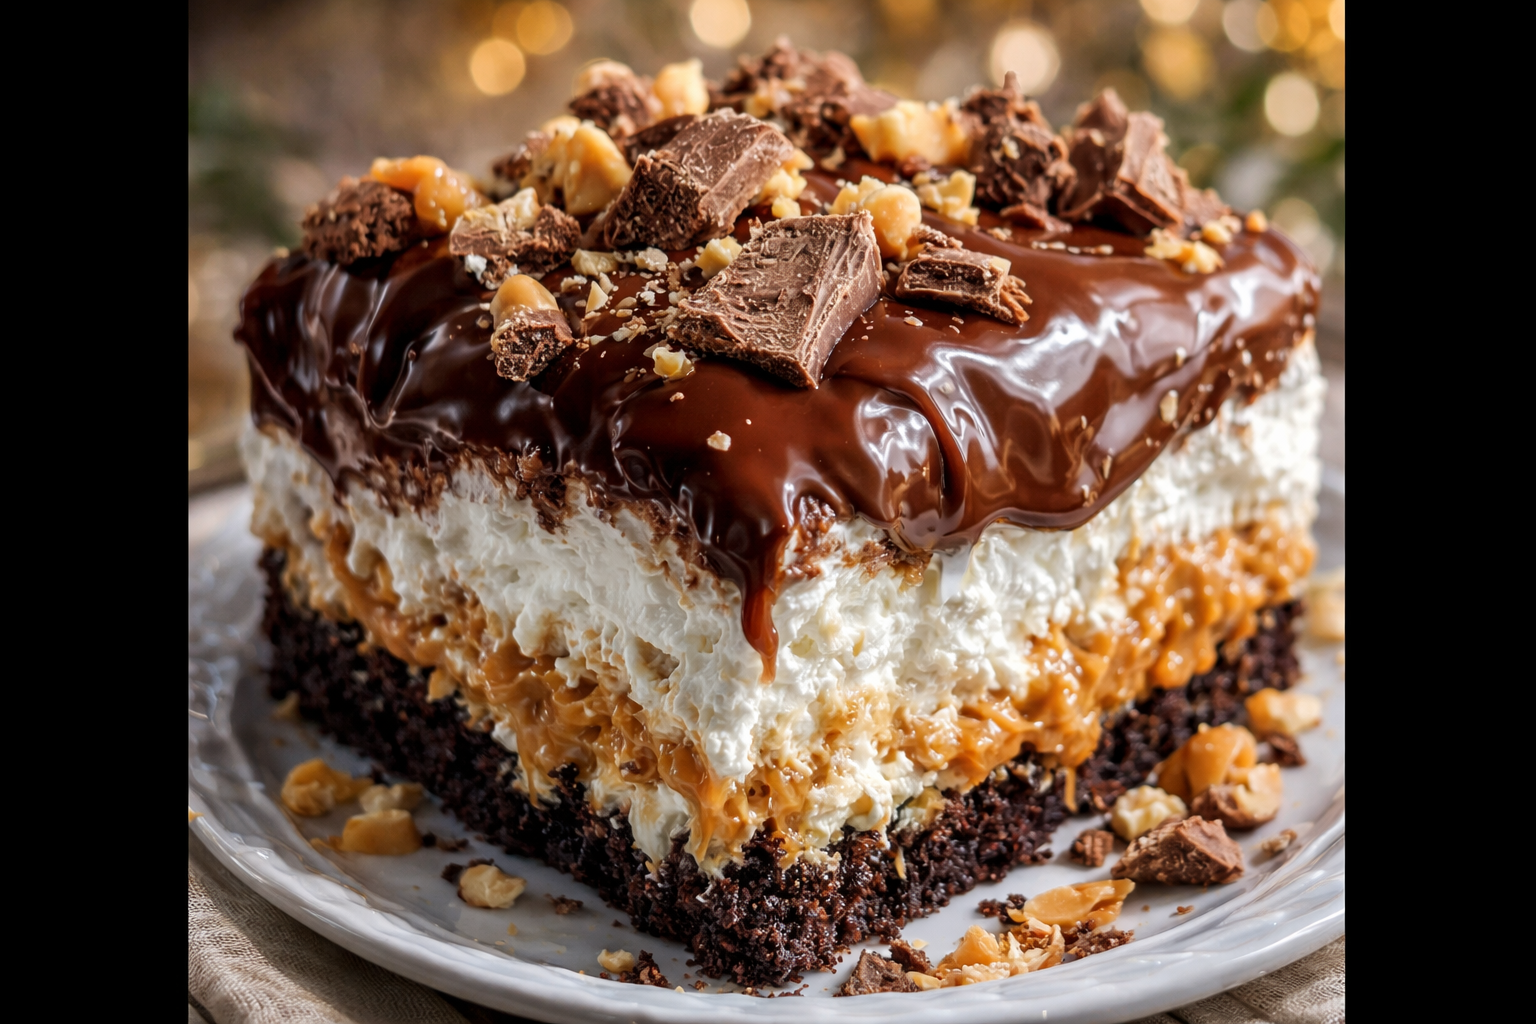
Dive into a slice of heaven with this Reese’s Poke Cake, where moist chocolate cake meets creamy peanut butter, swirls of condensed milk, and fluffy whipped topping, crowned with crunchy Reese’s Pieces and a drizzle of chocolate syrup. Each forkful delivers a symphony of textures — rich cake soaked in creamy layers, ending with a satisfying crunch from candy toppings. This dessert feels indulgent enough for special occasions yet easy enough to make on a weeknight.
If you’re searching for easy dinner recipes dessert, family comfort food, or a quick weeknight recipe that wows without hours in the kitchen, this poke cake checks all the boxes. It’s an affordable, crowd-pleasing treat that transforms basic pantry ingredients into something spectacular.
Why You’ll Love This Recipe:
- Simple Ingredients & Minimal Effort: Uses pantry staples and a boxed cake mix for a fast but decadent dessert — an ideal easy dessert recipe for beginners.
- Over-the-Top Flavor: Chocolate, peanut butter, and sweet cream combine into a dessert that tastes gourmet but is remarkably effortless.
- Family Favorite: Loved by kids and adults alike — a perfect addition to simple family recipes that bring joy at the table.
- Make-Ahead Friendly: Can be prepared in advance and refrigerated until serving — perfect for meal prep ideas or hosting.
- Showcase Dessert: With its layers, fillings, and candy toppings, it turns heads and tastes amazing — great for easy party food ideas and gatherings.
- Budget-Friendly Indulgence: Uses accessible, affordable ingredients while delivering a rich, bakery-style dessert.
Ingredient Breakdown:
- Chocolate Cake Mix (1 box): The foundation of the dessert — easy, reliable, and full of chocolate flavor. A great option among budget-friendly groceries for quick baking.
- Eggs, Water & Vegetable Oil (per box instructions): These standard cake mix additions provide structure, moisture, and a tender crumb.
- Creamy Peanut Butter (1 cup): Folded into the batter and mixed into the filling, this gives a nutty richness that harmonizes beautifully with chocolate.
- Sweetened Condensed Milk (1 can): Poured over poked holes to impart lush, creamy sweetness deep into every slice.
- Heavy Whipping Cream (1 cup): Whipped into a light topping that balances the richness of the cake and filling.
- Powdered Sugar (¼ cup): Sweetens and stabilizes the whipped cream topping.
- Vanilla Extract (1 tsp): Enhances all the flavors — chocolate, peanut butter, and cream.
- Reese’s Pieces (1 cup): Adds vibrant color, crunch, and peanut butter–chocolate flavor bursts in every bite.
- Chocolate Syrup (for drizzling): A final flourish of chocolate sauce to intensify richness and make the presentation pop.
Pro Tips:
- Follow Cake Mix Instructions Carefully: Don’t overmix; stir just until smooth to retain fluffiness.
- Evenly Poke the Cake: Use the handle of a wooden spoon or a skewer about 1 inch apart so that the filling can seep through consistently.
- Warm Filling Slightly: Gently warm the peanut butter and condensed milk mixture for a few seconds to help it flow into the holes nicely.
- Chill Before Whipping: Make sure the cake is cooled and chilled (at least 1 hour) before applying whipped cream to prevent melting.
- Top Just Before Serving: Add Reese’s Pieces and chocolate drizzle right before serving to keep crunch and visual appeal intact.
Ingredient Swaps or Variations:
- Gluten-Free Version: Use a gluten-free chocolate cake mix to make this gluten-free dessert recipe.
- Vegan or Dairy-Free Option: Use plant-based chocolate cake mix, nondairy milk in place of condensed milk, and coconut whipping cream for healthy recipe alternatives.
- Low-Sugar Variation: Use sugar-free sweetened condensed milk and whipped cream sweetened with sugar substitutes for a lighter version.
- Nut-Free Version: Replace peanut butter with sunflower butter and use chocolate candies without peanuts to make this safe for nut-allergy households.
- Mini Cakes or Cupcakes: Bake in muffin tins and poke each cupcake for party-sized dessert portions.
Serving Suggestions:
- Serve chilled slices on dessert plates with a scoop of vanilla or peanut butter ice cream for an over-the-top experience.
- Pair with fresh strawberries or raspberries for a pop of brightness to contrast the rich chocolate and peanut butter.
- Offer coffee, espresso, or iced coffee alongside to cut through the sweetness and complement the flavors.
- Display on a dessert buffet or potluck table—this cake’s layers and toppings make it a standout easy party food idea.
Make Ahead + Storage Tips:
- Refrigeration: Cover tightly with plastic wrap or foil and store in the fridge for 2–3 days. The cake flavors deepen when chilled.
- Freeze (before topping): Freeze the baked, poked cake (without whipped topping) for up to 2 months. Thaw overnight and then add whipped cream and candy toppings.
- Whipped Cream Keep: If you have leftover whipped cream, store it in an airtight container in the fridge (max 24 hours) and re-whip slightly before using.
- Dessert Prep Strategy: Bake and infuse the cake the night before, allowing you to top and serve fresh on the day of your event. A great leftover recipe hack for busy schedules.
Cultural or Historical Notes:
Poke cakes, a dessert trend dating back several decades, became popular for their simplicity and dramatic results. The technique of poking holes and filling them with sweet sauces transforms a basic boxed cake into a layered, decadent treat. Combining that concept with peanut butter and chocolate riffs on classic American candy flavors (like Reese’s) for a modern twist on American comfort food and a dessert that’s nostalgic and innovative.
Frequently Asked Questions (FAQ):
Can I assemble this cake ahead of time?
Yes — bake, poke, and add the filling ahead. Wait to apply whipped cream and add toppings until just before serving to preserve texture.
How should I store leftovers?
Keep the cake covered in the fridge for up to 2–3 days. For best texture, eat sooner rather than later.
Can I make this recipe healthier?
You can reduce sugar content, use reduced-fat or plant-based alternatives, or skip the candy toppings for a lighter version while keeping core flavors.