When it comes to show-stopping desserts that combine elegance with irresistible flavors, few can compete with the Strawberry Shortcake Cheesecake Roll. Imagine a soft, fluffy sponge cake rolled around a rich cheesecake filling, layered with juicy strawberries, and topped with whipped cream and crushed cookies for that shortcake crunch. This dessert is as delightful to look at as it is to eat—perfect for birthdays, spring gatherings, summer picnics, or any time you want to impress your guests.
In this guide, we’ll dive into everything you need to know about making this decadent treat—from the ingredients list to the rolling technique, plus tips and tricks to help you nail it every time. By the end, you’ll feel confident enough to whip up this bakery-worthy dessert right in your own kitchen.
Why You’ll Love This Recipe
-
Flavor Explosion – Fresh strawberries, creamy cheesecake filling, and soft cake layers make every bite heavenly.
-
Beautiful Presentation – The rolled look and colorful strawberries make this a centerpiece dessert.
-
Make-Ahead Friendly – You can prepare the roll a day in advance and let it chill in the fridge.
-
Customizable – Switch up the fruit, add flavored extracts, or top with white chocolate drizzle for your own twist.
Ingredients for Strawberry Shortcake Cheesecake Roll
Here’s everything you’ll need:
For the Sponge Cake:
-
4 large eggs (room temperature)
-
¾ cup granulated sugar
-
1 tsp vanilla extract
-
¾ cup all-purpose flour (sifted)
-
1 tsp baking powder
-
¼ tsp salt
-
2 tbsp whole milk
For the Cheesecake Filling:
-
8 oz cream cheese (softened)
-
½ cup powdered sugar
-
1 cup heavy whipping cream (cold)
-
1 tsp vanilla extract
For the Strawberry Layer:
-
1 ½ cups fresh strawberries (hulled and diced)
-
2 tbsp granulated sugar (to macerate the strawberries)
For the Shortcake Topping:
-
6–8 shortbread cookies or golden Oreos (crushed into crumbs)
-
Fresh strawberries (halved or sliced, for garnish)
-
Whipped cream (for topping)
Step-by-Step Instructions
Step 1: Preparing the Cake Roll
-
Preheat oven to 350°F (175°C). Line a 10×15-inch jelly roll pan with parchment paper and lightly grease it.
-
In a large mixing bowl, beat the eggs for about 5 minutes until thick and pale. Slowly add sugar and continue beating.
-
Stir in vanilla.
-
In a separate bowl, sift together flour, baking powder, and salt.
-
Gently fold dry ingredients into the egg mixture, alternating with milk. Do not overmix.
-
Spread the batter evenly into the prepared pan.
-
Bake for 10–12 minutes, or until cake springs back when lightly touched.
Step 2: Rolling the Cake
-
While cake is still warm, carefully invert it onto a clean kitchen towel dusted with powdered sugar.
-
Peel off the parchment paper.
-
Starting from the short end, gently roll up the cake inside the towel.
-
Allow it to cool completely while rolled.
Tip: Rolling it while warm prevents cracks later when you fill it.
Step 3: Making the Cheesecake Filling
-
Beat cream cheese and powdered sugar until smooth.
-
Add vanilla extract.
-
In a separate chilled bowl, whip the heavy cream until stiff peaks form.
-
Fold whipped cream into cream cheese mixture until fluffy.
Step 4: Preparing the Strawberries
-
Mix diced strawberries with sugar and let sit for 10–15 minutes to release juices.
-
Drain excess liquid before adding to cake to prevent sogginess.
Step 5: Assembling the Roll
-
Carefully unroll the cooled cake.
-
Spread an even layer of cheesecake filling over the surface.
-
Sprinkle drained strawberries across the filling.
-
Gently re-roll the cake without the towel this time.
-
Wrap tightly in plastic wrap and refrigerate for at least 2 hours (or overnight) to firm up.
Step 6: Decorating the Shortcake Roll
-
Once chilled, unwrap and place the roll on a serving platter.
-
Spread whipped cream on top.
-
Sprinkle crushed cookies generously.
-
Garnish with sliced strawberries.
Preparation and Cooking Time
-
Prep Time: 25 minutes
-
Cooking Time: 12 minutes
-
Cooling/Chilling Time: 2–4 hours
-
Total Time: About 3 hours
Nutritional Information (Per Slice, approx. 12 slices)
-
Calories: 290
-
Protein: 4g
-
Carbohydrates: 32g
-
Fat: 16g
-
Sugar: 20g
-
Fiber: 1g
Note: Nutrition varies depending on portion size and toppings used.
Tips for Success
-
Don’t Overbake – A dry cake will crack when rolled. Watch carefully at the 10-minute mark.
-
Roll While Warm – Always roll the sponge while it’s warm to prevent breaking.
-
Chill the Cream – Use very cold heavy cream for the filling—it whips better and holds shape.
-
Drain Strawberries – Too much juice will cause the filling to leak.
-
Slice with a Hot Knife – Dip knife in hot water, wipe dry, then slice for clean edges.
Variations to Try
-
Chocolate Strawberry Cheesecake Roll – Add cocoa powder to the sponge cake.
-
Lemon Berry Roll – Replace vanilla with lemon extract and add blueberries with strawberries.
-
White Chocolate Drizzle – Melt white chocolate and drizzle over the roll for an elegant finish.
-
Nutty Twist – Add crushed almonds or pistachios into the topping for crunch.
Serving Ideas
-
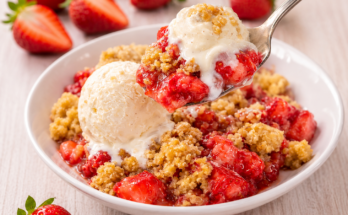
Serve with a scoop of vanilla ice cream for extra indulgence.
-
Add a drizzle of strawberry syrup for more berry flavor.
-
Pair with champagne or sparkling rosé for a festive celebration.
Storage Instructions
-
Store covered in the refrigerator for up to 3 days.
-
Do not freeze assembled roll (the cream filling won’t thaw well). However, you can freeze the sponge cake alone (rolled in parchment) for up to 1 month.
Final Thoughts
The Strawberry Shortcake Cheesecake Roll is more than just a dessert—it’s an experience. From the pillowy sponge cake to the luscious cheesecake filling and the vibrant strawberry layer, it brings together all the textures and flavors of a classic shortcake in a playful rolled form. Whether you’re making it for a special occasion or simply to satisfy a sweet craving, this recipe guarantees smiles and second helpings.