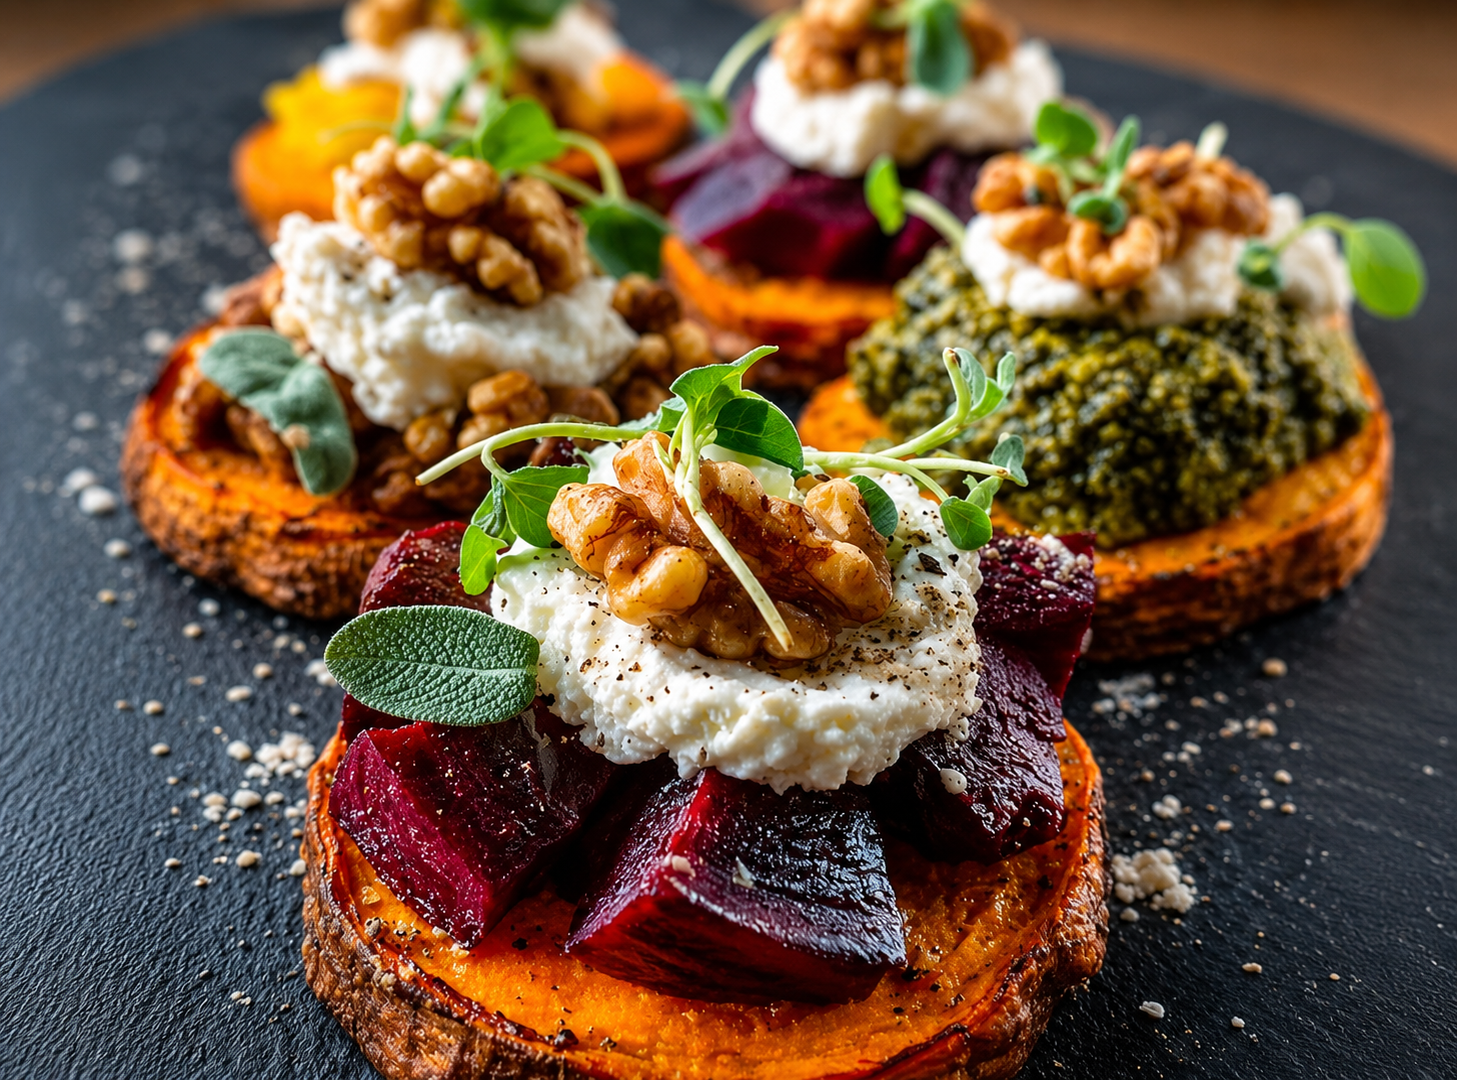
This is the type of appetizer that instantly makes a table look expensive.
Everything about these little bites feels:
- colorful
- earthy
- elegant
- rustic
- ridiculously chef-core
You’ve got:
- roasted sweet potato rounds
- deep ruby-red beets
- creamy whipped cheese
- crunchy walnuts
- fresh herbs everywhere
Honestly?
This looks like something served at a candlelit farm-to-table restaurant where the menu changes daily.
🍠 The Sweet Potato Base Is Such A Smart Idea
Using roasted sweet potato instead of bread completely changes the vibe.
It makes the dish feel:
- richer
- earthier
- naturally sweet
- more gourmet
- visually stunning
And look at those caramelized edges.
That slight char tells you they’re roasted perfectly:
crispy outside,
soft inside,
packed with flavor.
❤️ The Beets Make These Look INSANELY Beautiful


Beets always make dishes look dramatic in the best way possible.
That deep jewel-toned color against the orange sweet potato is honestly gorgeous.
And roasted beets bring this incredible balance of:
- sweetness
- earthiness
- softness
- richness
Plus visually?
They make every plate look instantly elevated.
🤍 That Creamy Cheese Looks Unreal
That whipped cheese on top is absolutely carrying luxury energy.
Could be:
- whipped ricotta
- goat cheese
- feta mousse
- mascarpone blend
Whatever it is…
it looks silky, airy, and insanely smooth.
And pairing creamy cheese with roasted vegetables is one of those combos that never fails.
🌰 Walnuts Add The Perfect Crunch
The walnuts are such a good choice because they bring:
- texture
- nuttiness
- warmth
- slight bitterness
Without crunch, soft dishes can feel flat.
But those toasted walnuts create that perfect contrast against the creamy cheese and tender vegetables.
🌿 The Herbs Make Everything Feel Fresh And Fancy
Those little greens and herbs completely transform the presentation.
Now it doesn’t just look healthy.
It looks:
- artisanal
- upscale
- restaurant-level
- curated
Tiny herbs somehow make every dish look 10x more expensive.
That’s just science at this point.
🍷 This Feels Like Peak Wine Night Food
These are 100% the kind of appetizers served with:
- red wine
- sparkling rosé
- charcuterie boards
- candlelight dinners
- jazz playing quietly somewhere
Not heavy.
Not greasy.
Just elegant little bites packed with flavor.
✨ The Color Palette Is Actually Stunning
This plate is beautiful because the colors naturally work together:
- orange sweet potato
- burgundy beets
- white creamy cheese
- green herbs
- golden walnuts
It feels warm, cozy, and luxurious all at once.
You could literally frame this photo in a modern kitchen.
🥄 These Look Fancy But Probably Taste Comforting
That’s what makes dishes like this special.
They look super refined…
but the flavors are still comforting and earthy.
Nothing feels overly complicated.
Just:
- roasted vegetables
- creamy cheese
- crunchy nuts
- fresh herbs
Simple ingredients done beautifully.
📸 This Is Pinterest Gold
Let’s be real.
This is exactly the type of food people save instantly because it hits every aesthetic category:
- healthy-ish
- gourmet
- rustic luxury
- colorful plating
- seasonal food vibes
This belongs on:
- Pinterest boards
- restaurant menus
- lifestyle magazines
- “hosting dinner party ideas” collections
😭 The Flavor Combo Must Be Incredible
Imagine one bite:
- warm sweet potato
- soft roasted beet
- cool creamy ricotta
- crunchy walnut
- fresh herbs
Sweet.
Savory.
Creamy.
Earthy.
Crunchy.
That balance is elite.
🌟 Final Thoughts
These roasted sweet potato and beet crostinis look:
- elegant
- earthy
- colorful
- luxurious
- wholesome
- beautifully balanced
Honestly this feels like the kind of appetizer people try once…
then immediately ask for the recipe before leaving the table.
Homemade Italian Cannoli with Ricotta Cream Filling
Homemade Italian Cannoli with Ricotta Cream Filling


Prep Time
- Prep: 40 minutes
- Cook: 15 minutes
- Chill: 1 hour
Servings
Makes 10–12 cannoli.
Ingredients
For the Cannoli Shells
- 2 cups all-purpose flour
- 2 tbsp sugar
- 1/2 tsp salt
- 2 tbsp unsalted butter, cold
- 1 egg yolk
- 1/2 cup sweet Marsala wine (or white grape juice)
- 1 tsp vanilla extract
- Oil for frying
For the Ricotta Filling
- 2 cups whole milk ricotta cheese
- 3/4 cup powdered sugar
- 1 tsp vanilla extract
- 1/2 tsp cinnamon
- 1/3 cup mini chocolate chips
Toppings
- Crushed pistachios
- Mini chocolate chips
- Powdered sugar for dusting
Instructions
Step 1: Make the Dough
- In a large bowl, combine flour, sugar, and salt.
- Cut in the cold butter until crumbly.
- Add egg yolk, vanilla, and Marsala wine.
- Mix until a dough forms.
- Knead for 5 minutes until smooth.
- Wrap the dough and let it rest for 30 minutes.
Step 2: Shape the Shells
- Roll the dough very thin on a floured surface.
- Cut circles about 4–5 inches wide.
- Wrap each circle around a cannoli mold.
- Seal the edges with a little water.
Step 3: Fry Until Crispy
- Heat oil to 350°F (175°C).
- Fry the shells for 2–3 minutes until golden brown and bubbly.
- Remove carefully and let cool completely.
- Gently slide shells off the molds.
Step 4: Prepare the Filling
- Drain ricotta cheese well to remove excess moisture.
- In a bowl, mix ricotta, powdered sugar, vanilla, and cinnamon.
- Fold in mini chocolate chips.
- Chill the filling for 1 hour for the best texture.
Step 5: Fill the Cannoli
- Transfer filling into a piping bag.
- Pipe cream into both sides of each shell.
- Dip the ends into crushed pistachios or chocolate chips.
- Dust with powdered sugar before serving.
Serving Ideas
- Serve chilled with espresso or cappuccino.
- Add melted chocolate drizzle for extra richness.
- Garnish with extra pistachios for a bakery-style presentation.
Tips for Perfect Cannoli
- Drain ricotta overnight for ultra-creamy filling.
- Fill the shells right before serving to keep them crispy.
- Thin dough creates the signature light and crunchy texture.
Flavor Variations
Chocolate Cannoli
Add cocoa powder to the dough and extra chocolate chips in the filling.
Citrus Cannoli
Mix orange zest or lemon zest into the ricotta cream.
Nutella Cannoli
Swirl Nutella into the filling for a richer dessert.
Why People Love Cannoli
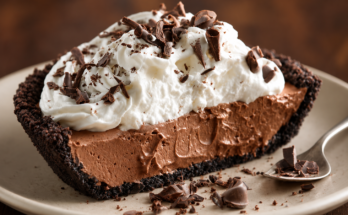
Cannoli are famous for their contrast of textures — crispy golden shells paired with silky sweet ricotta cream. The pistachios and chocolate chips add crunch and extra flavor, making every bite rich, creamy, and irresistible.
Blueberry Lava Cheesecake Mochi
Blueberry Lava Cheesecake Mochi


Prep Time
- Prep: 45 minutes
- Chill: 4 hours
- Cook: 15 minutes
Servings
Makes 6 blueberry mochi cheesecake domes.
Ingredients
For the Blueberry Compote Center
- 1 1/2 cups fresh blueberries
- 3 tbsp sugar
- 1 tbsp lemon juice
- 1 tsp cornstarch
- 1 tbsp water
For the Cheesecake Filling
- 8 oz cream cheese, softened
- 1/3 cup powdered sugar
- 1 tsp vanilla extract
- 1/2 cup whipped cream
For the Blue Mochi Layer
- 1 cup glutinous rice flour
- 1/4 cup sugar
- 1 cup milk
- 1 tbsp butter
- Blue food coloring or blueberry powder
Decoration
- Fresh blueberries
- Powdered sugar (optional)
Instructions
Step 1: Make the Blueberry Lava Center
- Add blueberries, sugar, and lemon juice to a saucepan.
- Cook over medium heat for 5–7 minutes until juicy.
- Mix cornstarch with water and pour into the berries.
- Stir until thick and glossy.
- Let cool completely.
- Spoon small portions onto a tray and freeze for 1 hour.
Step 2: Prepare the Cheesecake Filling
- Beat cream cheese until smooth.
- Add powdered sugar and vanilla.
- Fold in whipped cream gently.
- Chill until slightly firm.
Step 3: Make the Mochi Dough
- In a microwave-safe bowl, combine glutinous rice flour, sugar, and milk.
- Add a few drops of blue food coloring.
- Mix until smooth.
- Cover loosely and microwave for 2 minutes.
- Stir carefully, then microwave another 1–2 minutes until sticky and glossy.
- Add butter and knead while warm.
- Dust with cornstarch to prevent sticking.
Step 4: Assemble the Dessert
- Flatten a piece of mochi dough into a circle.
- Add cheesecake filling in the center.
- Place a frozen blueberry compote portion inside.
- Cover with more cheesecake filling if needed.
- Carefully wrap and seal the mochi around the filling.
- Shape into smooth spheres.
Step 5: Chill & Serve
- Refrigerate for at least 2 hours.
- Slice carefully before serving for the lava effect.
- Garnish with fresh blueberries.
Tips for the Perfect Lava Effect
- Freeze the blueberry center before assembling.
- Chill the finished mochi well so it slices cleanly.
- Use full-fat cream cheese for a richer texture.
Flavor Variations
Strawberry Lava Mochi
Replace blueberries with strawberries.
Matcha Blueberry Mochi
Add matcha powder to the cheesecake filling.
White Chocolate Blueberry
Mix melted white chocolate into the cream cheese layer.
Why This Dessert Is Special
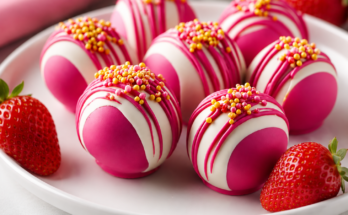
This dessert combines soft chewy mochi, creamy cheesecake, and a rich blueberry lava center in one elegant bite. The smooth blue shell and glossy berry filling create a stunning modern dessert that looks bakery-quality but can still be made at home.
Mini Lemon Cheesecakes
Mini Lemon Cheesecakes


Prep Time
- Prep: 25 minutes
- Bake: 25 minutes
- Chill: 3 hours
Servings
Makes 8 mini cheesecakes.
Ingredients
For the Crust
- 1 cup graham cracker crumbs
- 3 tbsp melted butter
- 2 tbsp sugar
For the Cheesecake Filling
- 16 oz cream cheese, softened
- 1/2 cup sugar
- 2 eggs
- 1/3 cup sour cream
- 2 tbsp heavy cream
- 2 tbsp fresh lemon juice
- 1 tbsp lemon zest
- 1 tsp vanilla extract
For Garnish
- Lemon slices
- Powdered sugar
- Fresh mint leaves (optional)
Instructions
Step 1: Prepare the Crust
- Preheat oven to 325°F (160°C).
- Line a muffin pan with cupcake liners.
- Mix graham cracker crumbs, melted butter, and sugar.
- Press mixture firmly into the bottom of each liner.
- Bake for 5 minutes, then let cool.
Step 2: Make the Cheesecake Filling
- Beat cream cheese until smooth and creamy.
- Add sugar and mix well.
- Add eggs one at a time.
- Mix in sour cream, heavy cream, lemon juice, lemon zest, and vanilla.
- Stir until silky smooth without overmixing.
Step 3: Bake
- Pour cheesecake filling over the crusts.
- Fill each cup nearly to the top.
- Bake for 18–22 minutes until the centers are slightly jiggly.
- Turn off oven and leave cheesecakes inside for 10 minutes.
Step 4: Chill
- Remove from oven and cool completely.
- Refrigerate for at least 3 hours or overnight for best texture.
Step 5: Decorate & Serve
- Dust with powdered sugar.
- Top with lemon slices and mint leaves.
- Serve chilled.
Tips for Perfect Cheesecake
- Use room-temperature cream cheese for a smoother filling.
- Do not overbake; the center should still wobble slightly.
- Chill overnight for the creamiest texture.
Flavor Variations
Blueberry Lemon Cheesecake
Top with blueberry sauce before serving.
Lemon Coconut Cheesecake
Add shredded coconut to the crust.
Honey Lemon Cheesecake
Replace part of the sugar with honey for a softer citrus sweetness.
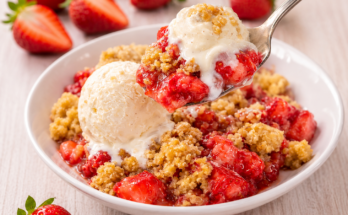
Why This Dessert Is So Popular
These mini lemon cheesecakes combine rich creamy texture with fresh citrus flavor in perfectly portioned servings. The buttery crust, tangy lemon filling, and powdered sugar topping create a refreshing dessert that feels light yet indulgent.