This chocolatey Black Forest cake is soft, creamy and bursting with cherry flavor. It’s layered with moist chocolate sponge, mascarpone Chantilly, and a rich cherry sauce that actually tastes like cherries. Not something that’s easy to achieve. My version isn’t the traditional way to make Black Forest, I think it’s better, more indulgent and melt in your mouth!

Hey team, Nick here! I’ve actually never been a fan of traditional Black Forest cake. It’s the soaked cherries. I just don’t like the texture, and I think that whole side of the cake isn’t thought through very well. I decided to see if I could make this cake better. More luscious and melt in your mouth.


Related – The chocolate sponge in this recipe is based on my Vanilla Sponge Cake. It’s as soft and airy as this cake and frankly, I won’t say no to anything filled with Chantilly cream and raspberry jam!
Traditionally, the cherries are soaked in Kirsch (cherry brandy) but I don’t like biting into almost raw cherries in a cake so I ended up making a thick cherry sauce that is smooth and luscious and has a strong cherry flavor. It’s silky and I think it pairs so nicely with the layers of soft chocolate sponge and mascarpone cream. It’s more of a melt in your mouth experience.
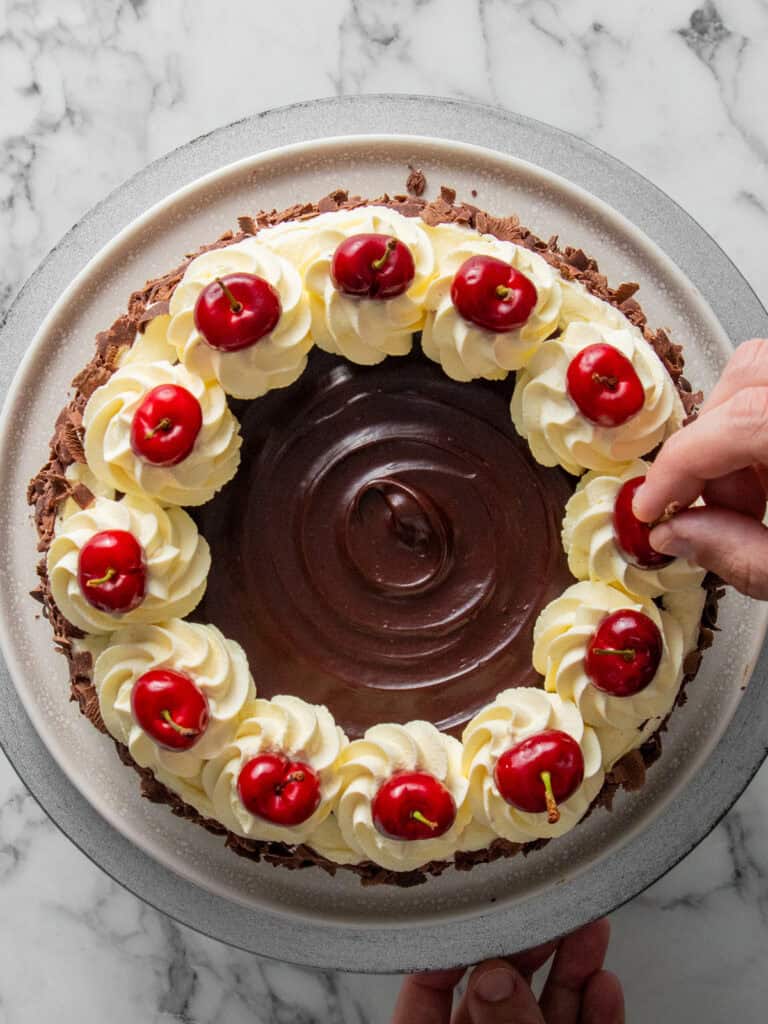
I topped it all off with my easy one bowl chocolate sauce, swirls of creamy Chantilly and fresh cherries but you can defos use maraschino cherries if fresh isn’t in season. I think what really finishes it off is the easy to make chocolate curls. Literally just a peeler and a block of chocolate! It looks traditional, but I reckon it tastes more special!
Andrea
I’ve been watching your recipes for years but never had the courage to try one at home. I am very proud to say that I just made your Black Forest Cake recipe and it turned out delicious! I have zero decorating skils, so it didn’t look as pretty as yours Nick, but it turned out tasty! Thanks for everything ❤️🍒
The sauce makes my black forest so luscious.
Chocolate and cherry is a classic combo. But chocolate can easily overpower it, so the goal here was making sure the cherry flavor was punchy. I did that by using canned cherries which are available year-round and much cheaper than fresh cherries. Plus I reckon for a cake like this the flavor is better because they come in their own brine which I used to make the sauce.
I thickened the sauce with corn starch which makes its smooth and glossy and spreadable in between each layer. And it’s as soft and smooth as the Chantilly. Pair it with a soft chocolate sponge and I mean. C’mon. Doesn’t get better.

How to make the cherry sauce
- Drain half the cherry brine into a jug, and half into a a large non-stick pot. Add the corn starch into the brine with the jug and whisk until well combined. Set aside.
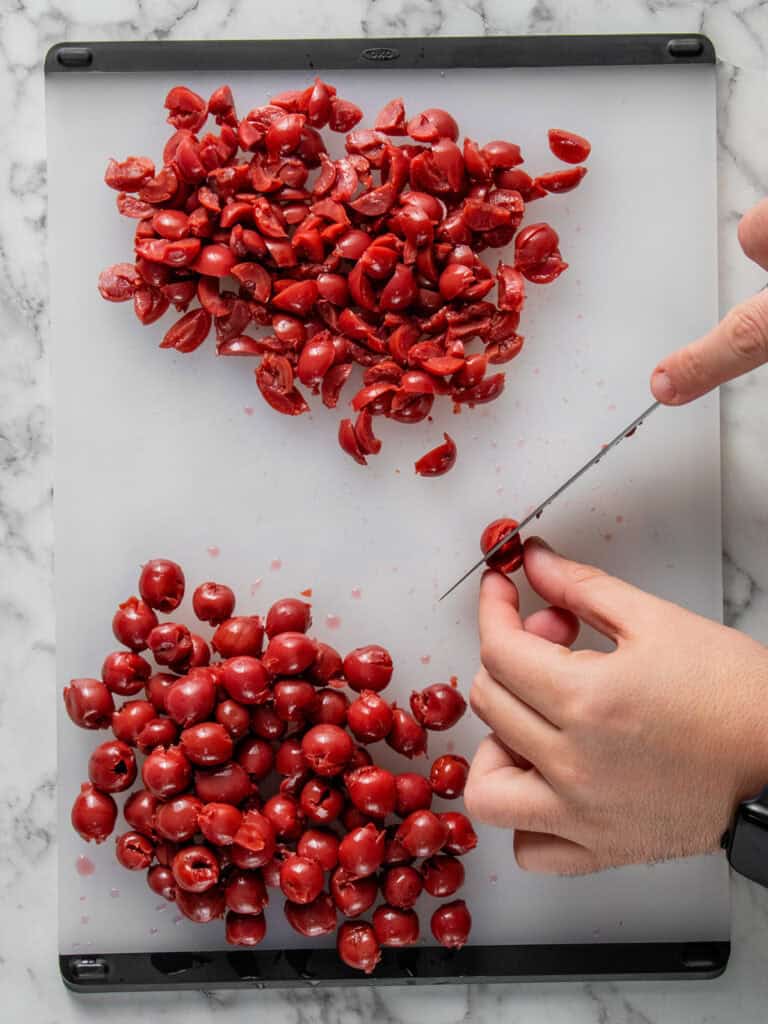
- Use a knife to roughly chop up your cherries.
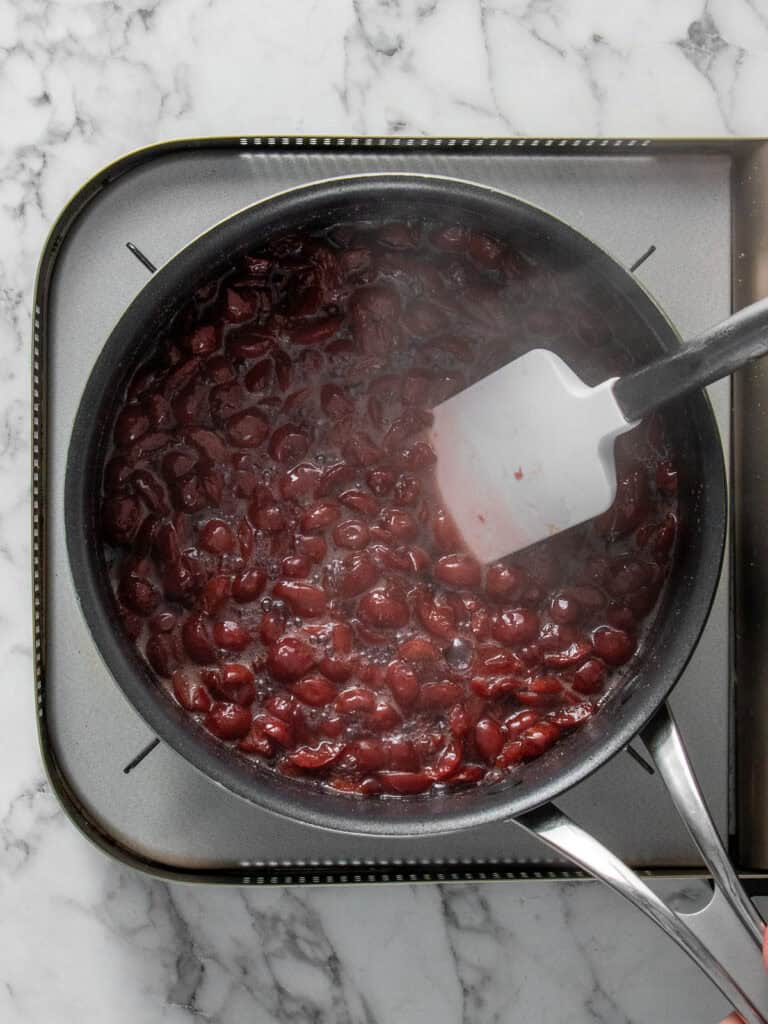
- Add half cherries to the non-stick pot along with all the sugar, lemon juice and salt. Stir continuously and bring to a boil on medium high heat. Then lower to medium heat and simmer for 3 minutes.
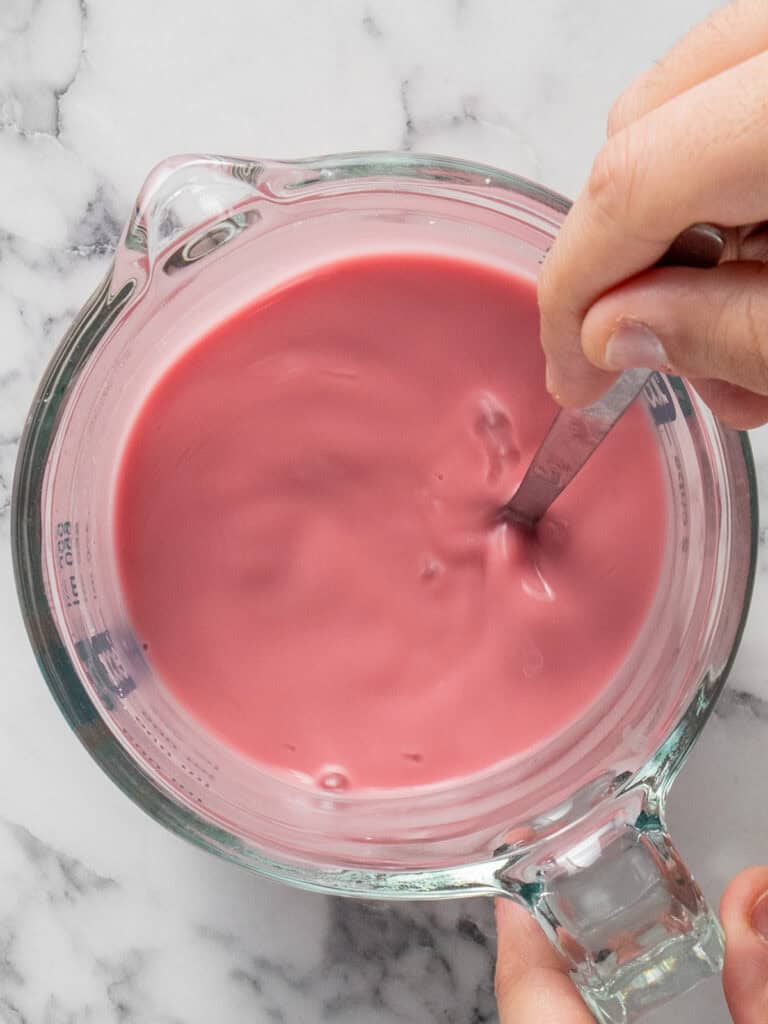
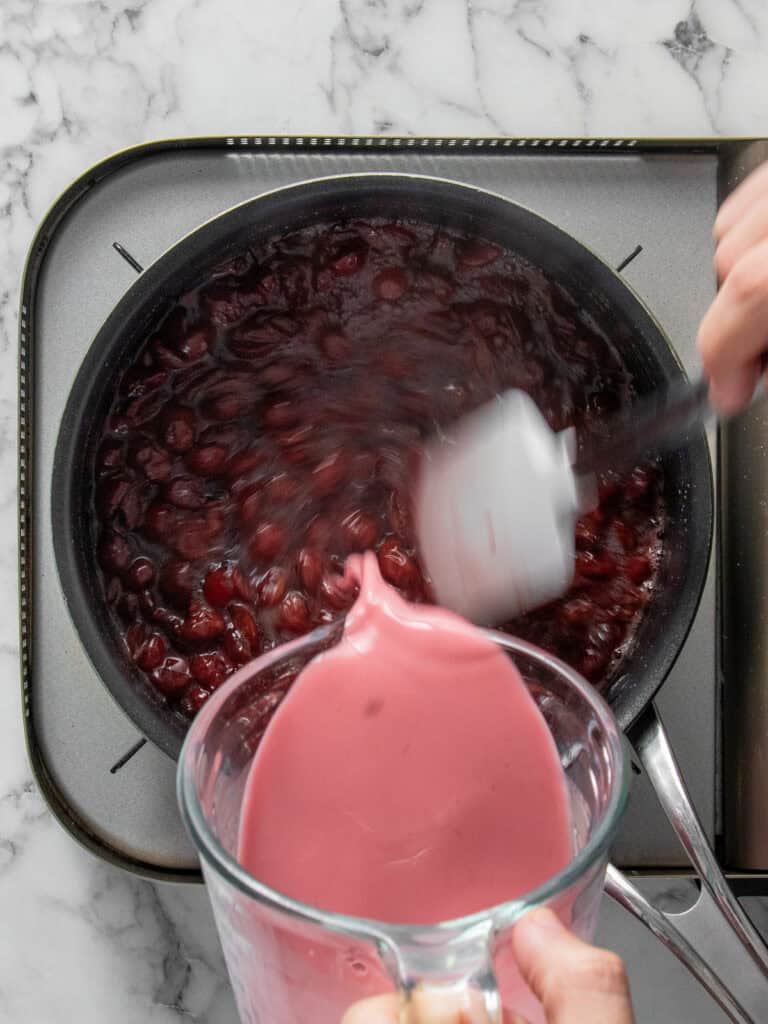
- Pour the slurry into the pot while continuously stirring. The mixture will be milky at first.
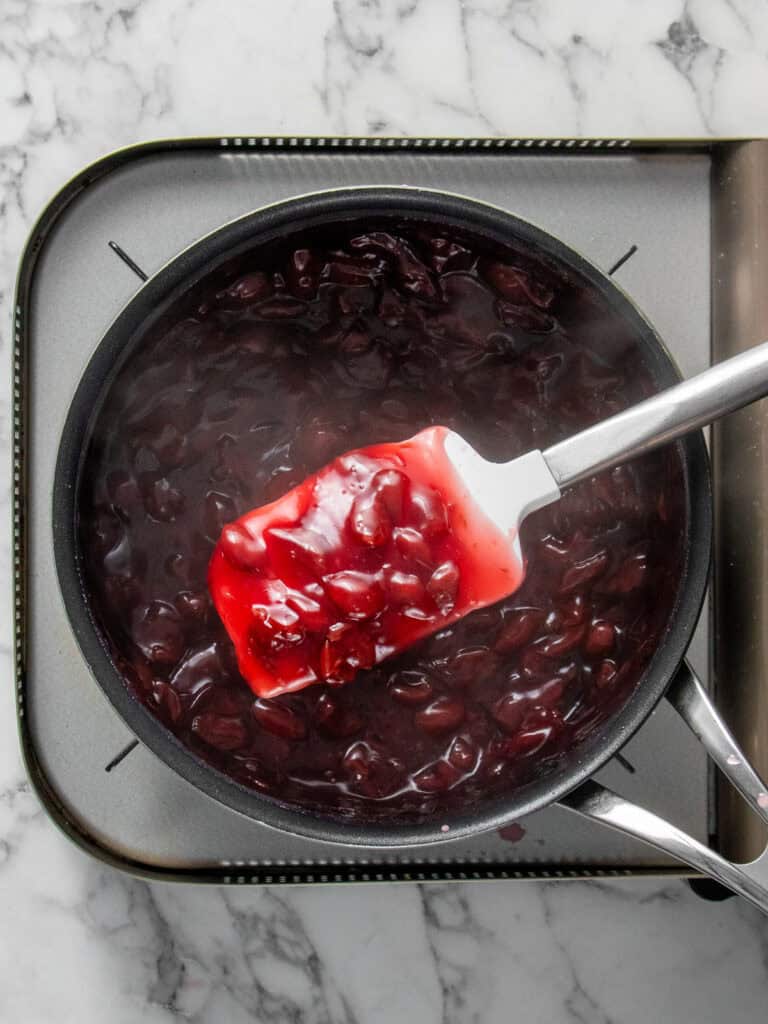
- Continue stirring until the mixture turns clear and thickens. Turn the heat off and add the remaining cherries and stir through to coat. Then add the kirsch and red food dye (optional) and stir to combine. Transfer to a heatproof bowl, cover with plastic wrap, making sure the plastic is on the surface of the sauce and set aside and allow to cool.
Tip – I like adding just a little drop of red food dye in my cherry sauce to boost that rosy cherry color. Optional, but I reckon it makes the layers look warmer!
Simple Syrup
Add the water and sugar into a pot and bring to a boil. When the sugar is dissolved, take off the heat and allow to cool completely. Add kirsch (if using) once it’s cooled. Add as much or as little as you like. More will make it boozier.
Chocolate Sponge Cake
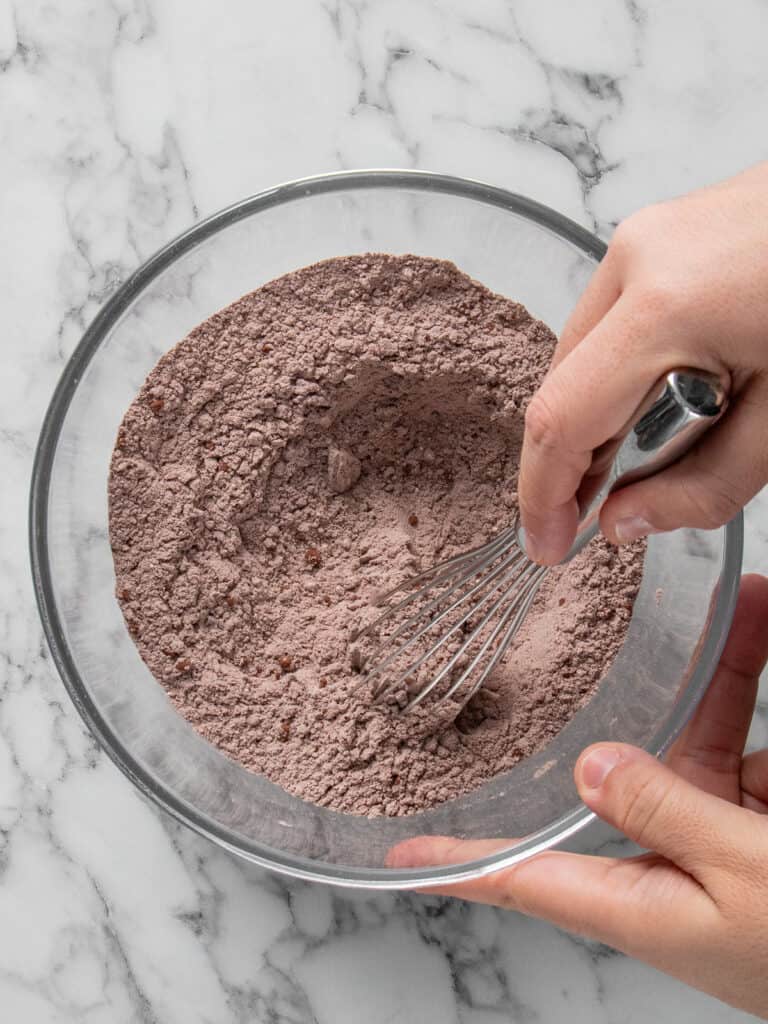
- Add the flour, baking powder and cocoa powder to a small bowl. Mix together.
- To a separate bowl, whip the egg whites and cream of tartar while slowly adding the sugar.
- You’ll reach a thick and glossy meringue.
- In a separate bowl add the egg yolks, sugar and vanilla extract until you reach a nice thick and pale mixture. This will take about 5 minutes.

- Add the dry ingredients to the egg yolk mixture and fold through gently.
- Add half the meringue and fold through gently. Repeat with the other half.
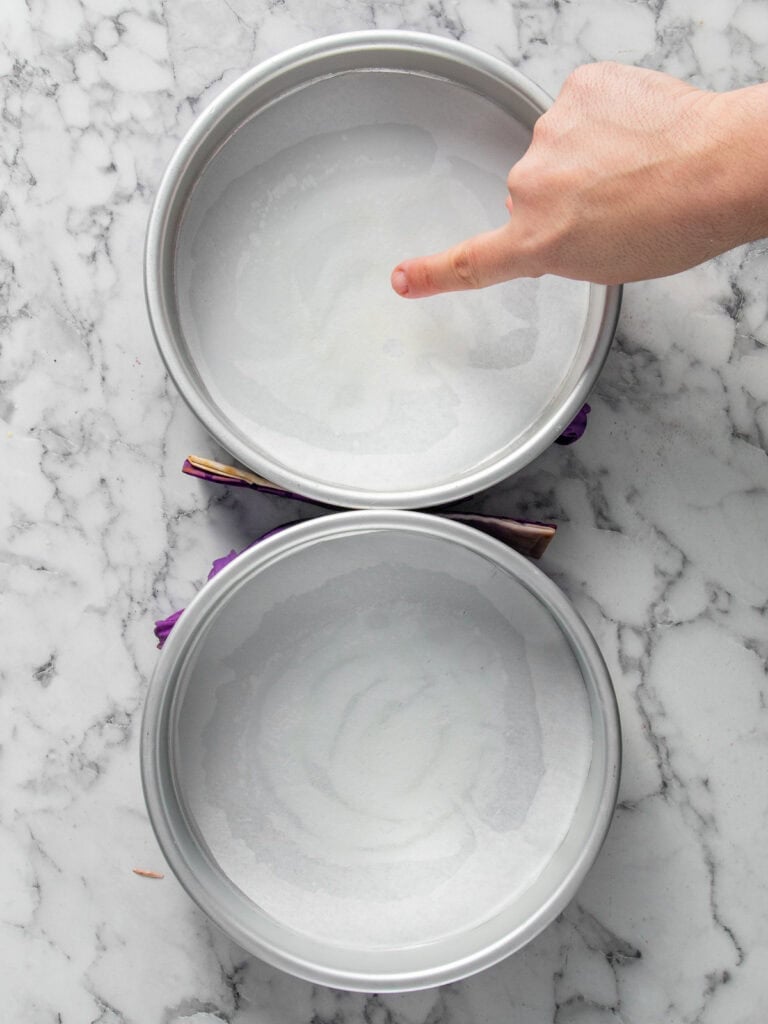
- Grease the bottom of your cake tin (not the sides). Line with baking paper.
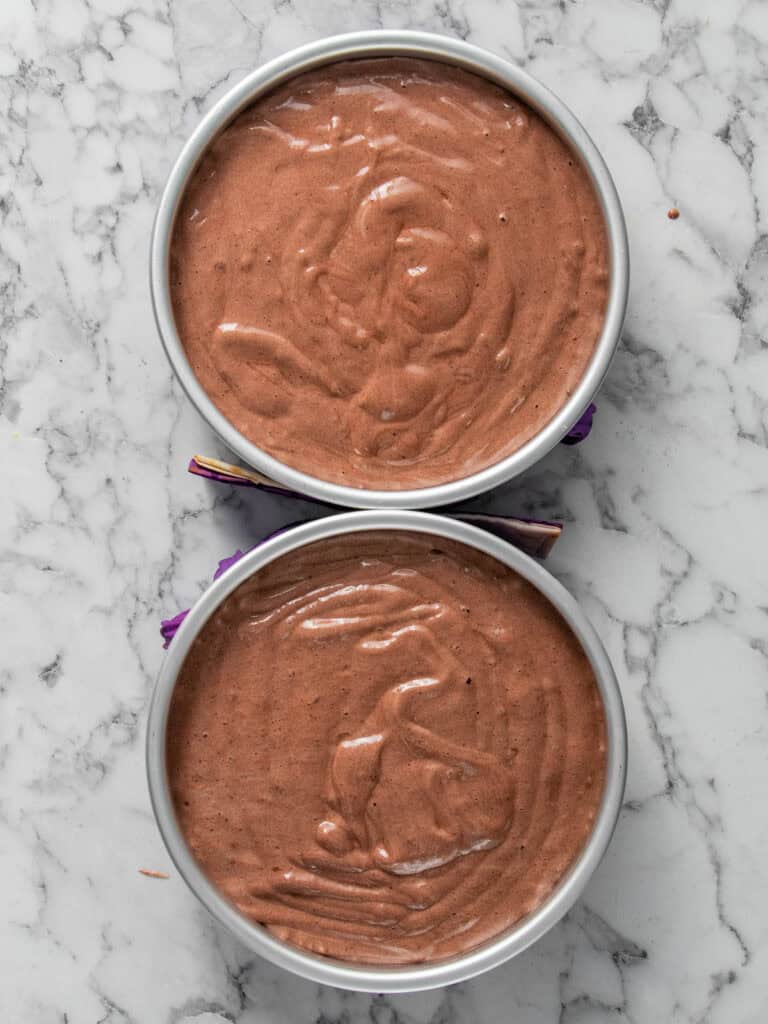
- Divide the batter between the cake tins. Bake
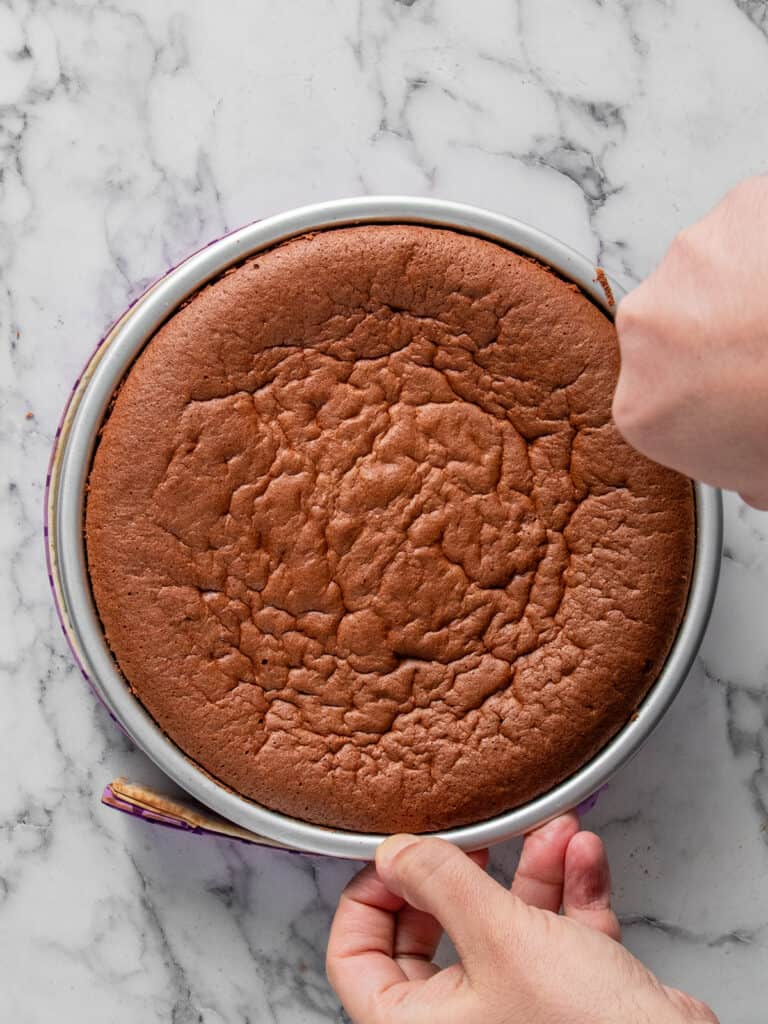
- Allow to cool in the tins for 10 minutes once baked. Loosen from the tin using a sharp knife and turn over onto a cooling rack to cool completely.
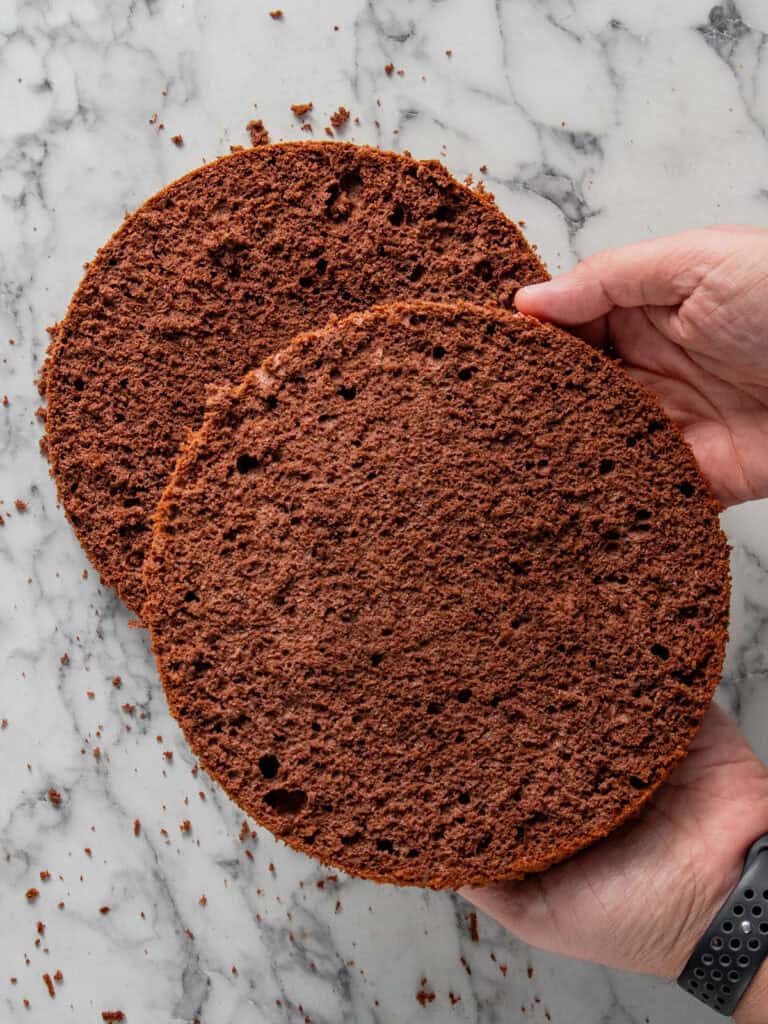
- Trim the very tops off the cakes and then trim in half. You’ll have 4 cake layers all up.
Let’s Decorate!
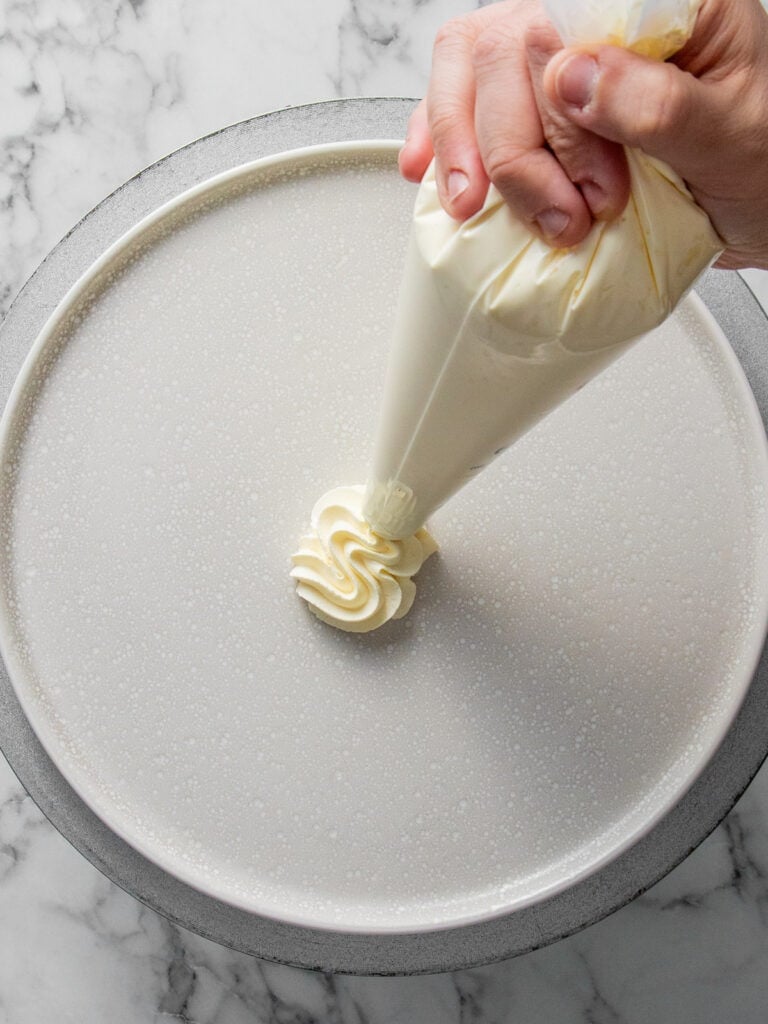
- Add some Chantilly cream on the bottom of your serving plate or cake board and spread. Add the first cake layer.
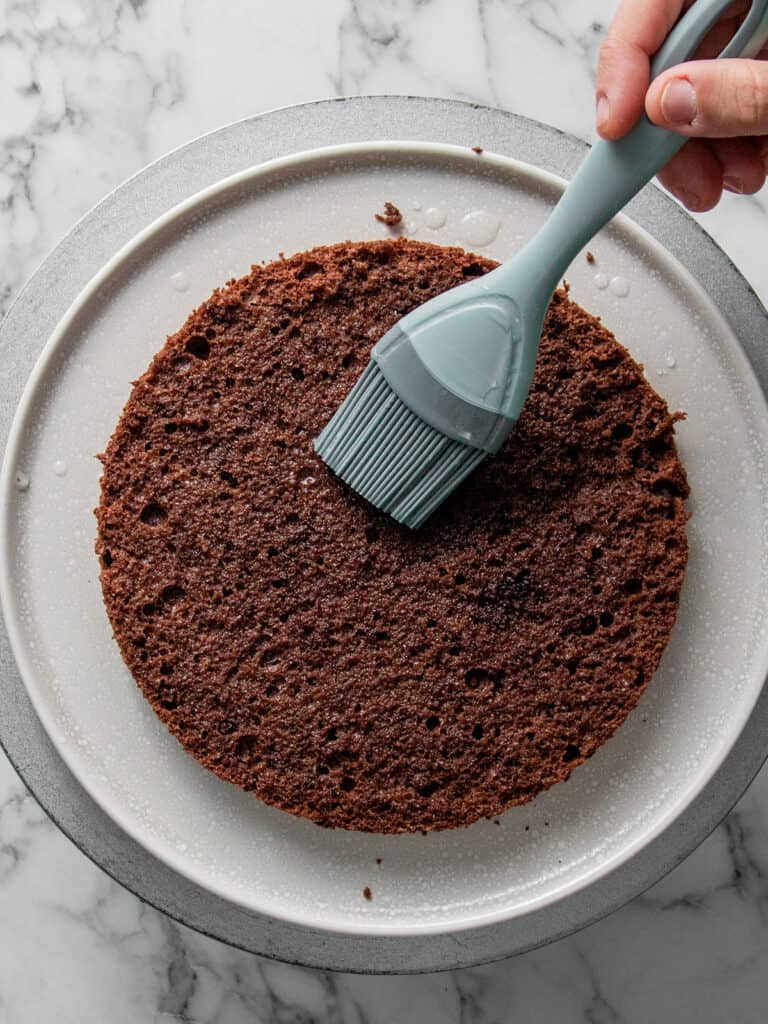
- Brush with cooled simple syrup.
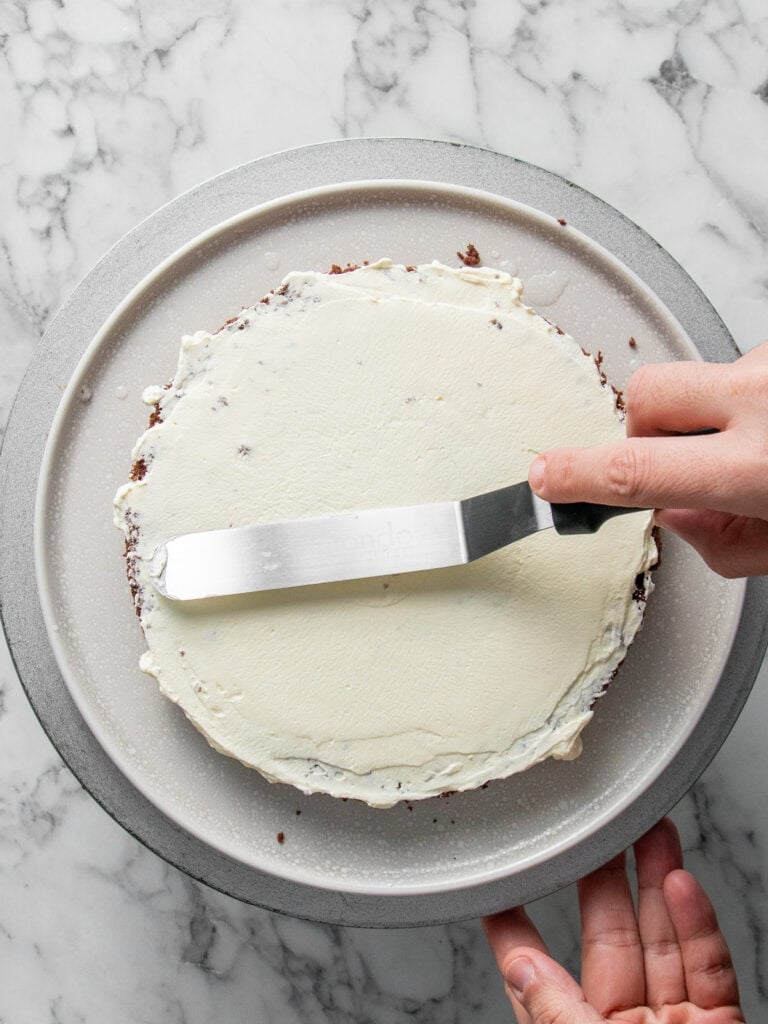
- Add a thin layer of cream.
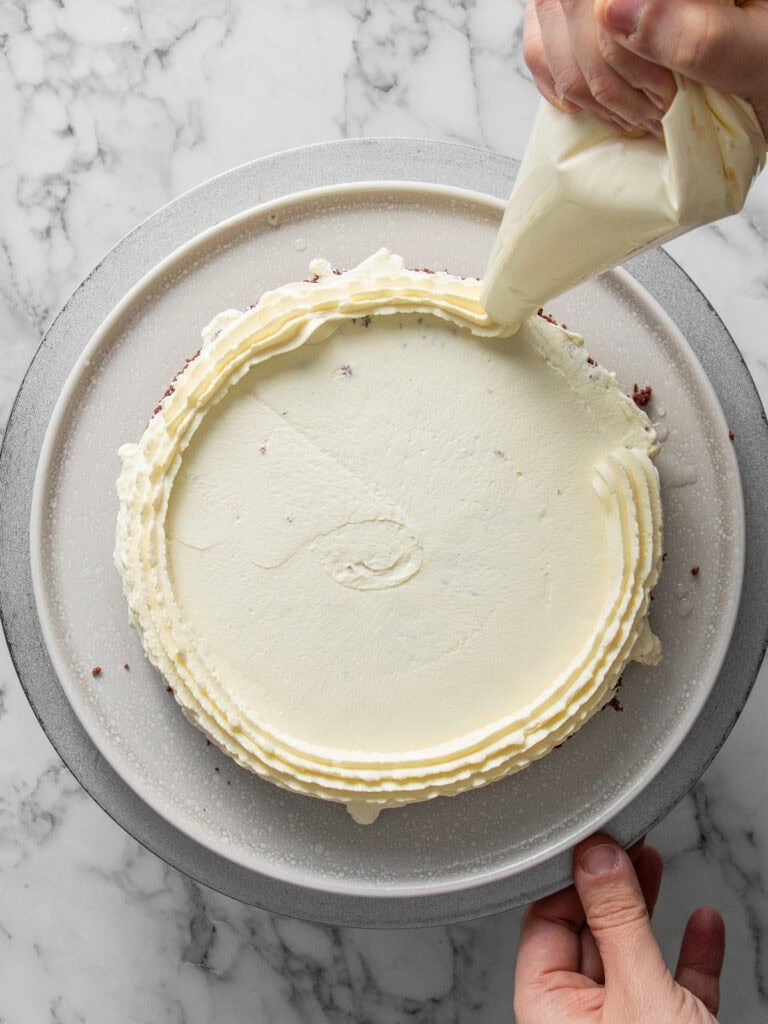
- Pipe a ring of cream on top.
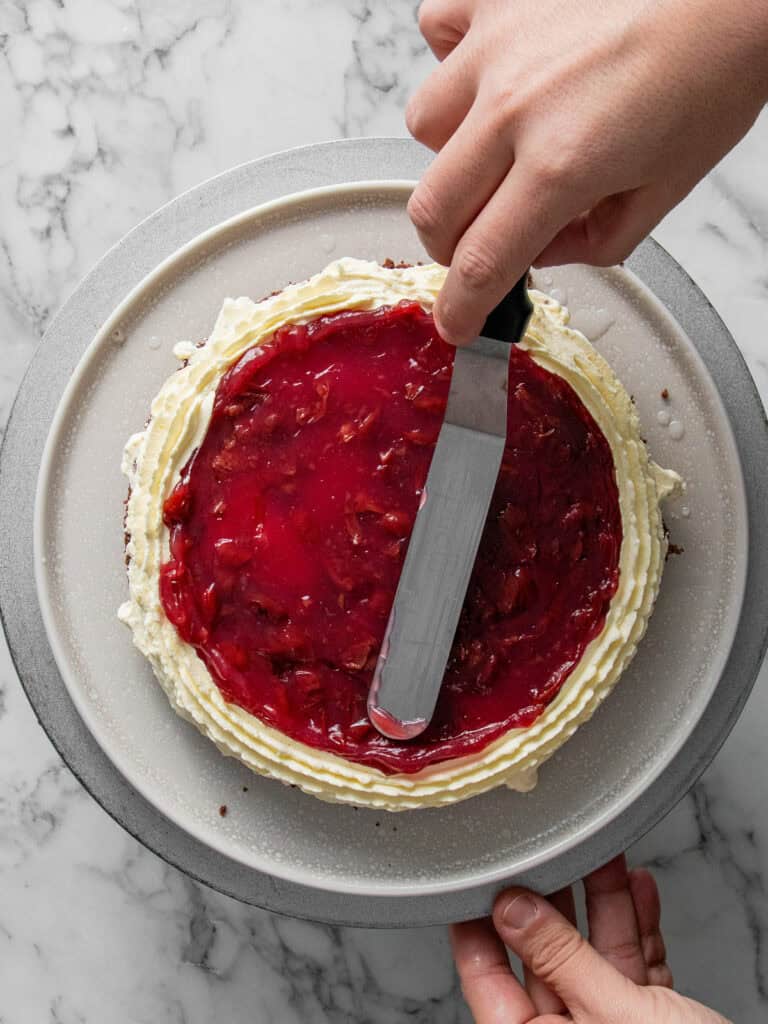
- Fill with 1/3 of the cherry sauce.
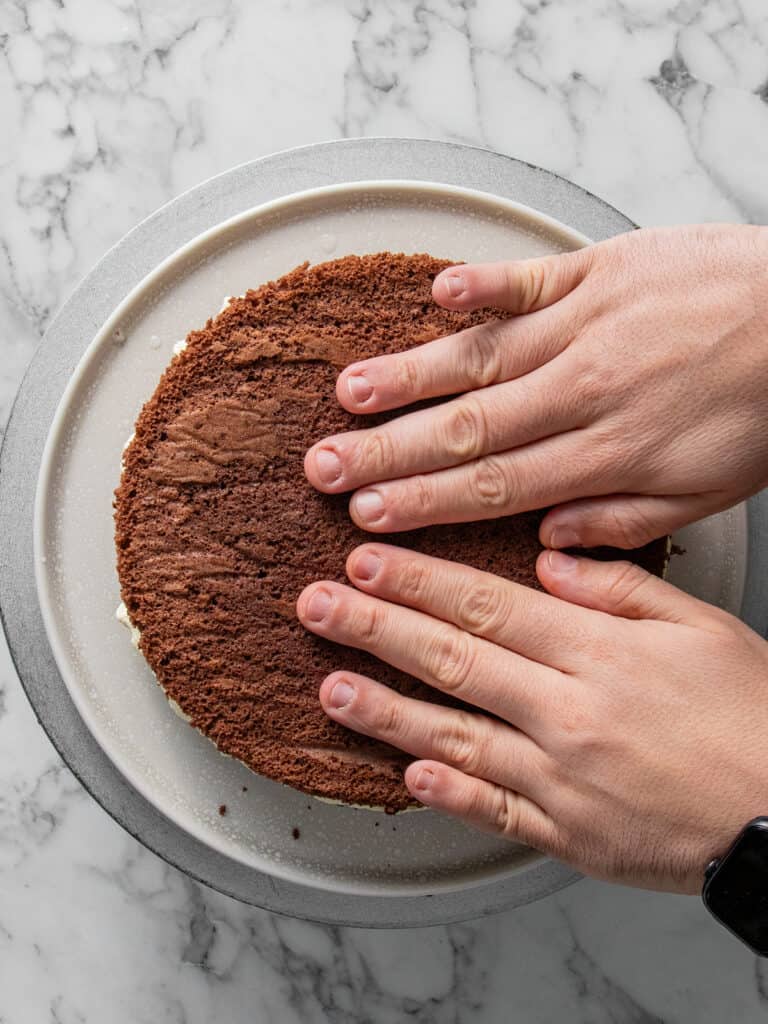
- Add the next layer of cake on top. Repeat this until all cake layers are on.
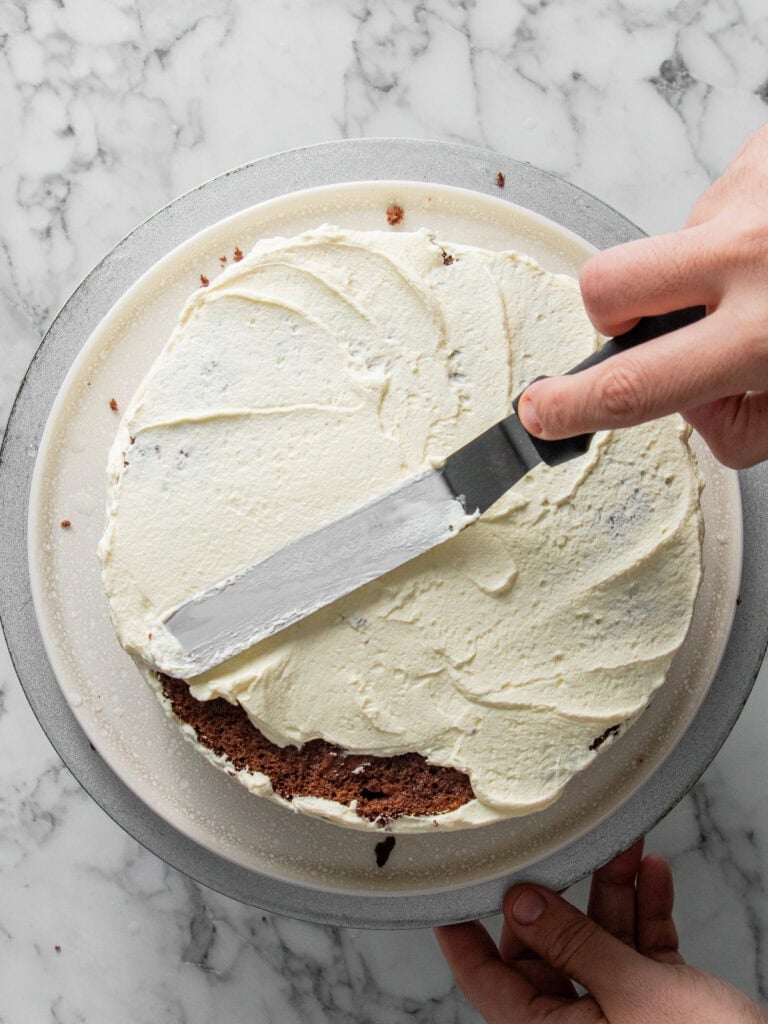
- Cover the top and sides of the cake with cream. Make sure you have enough to pipe swirls on top of the cake.
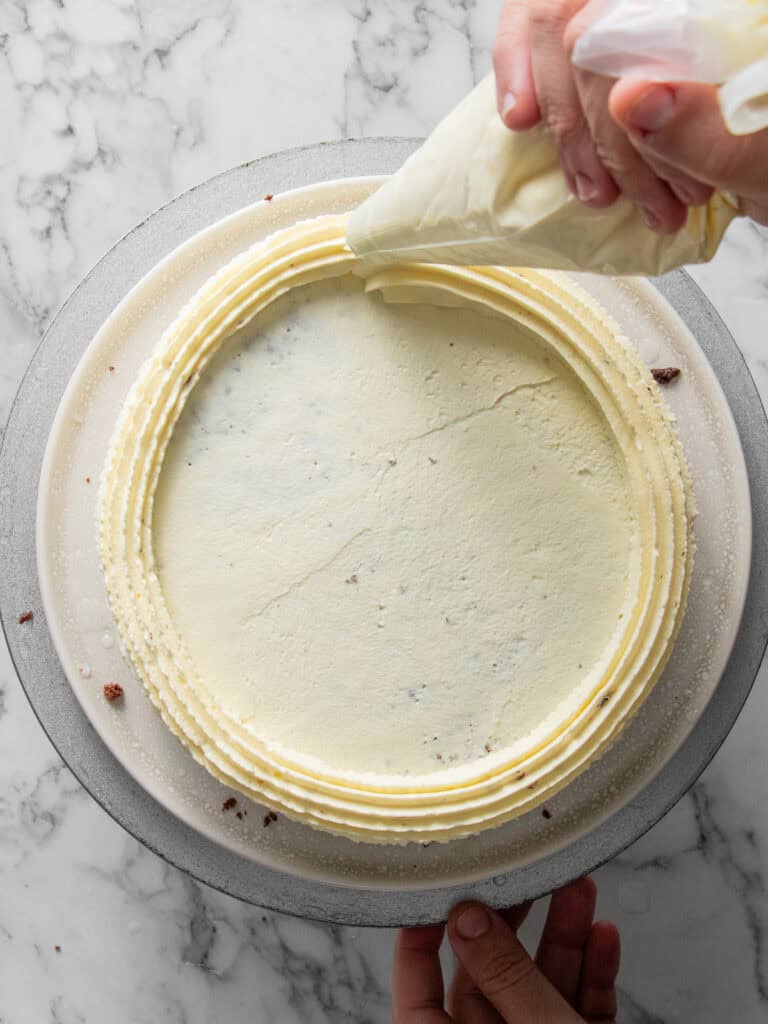
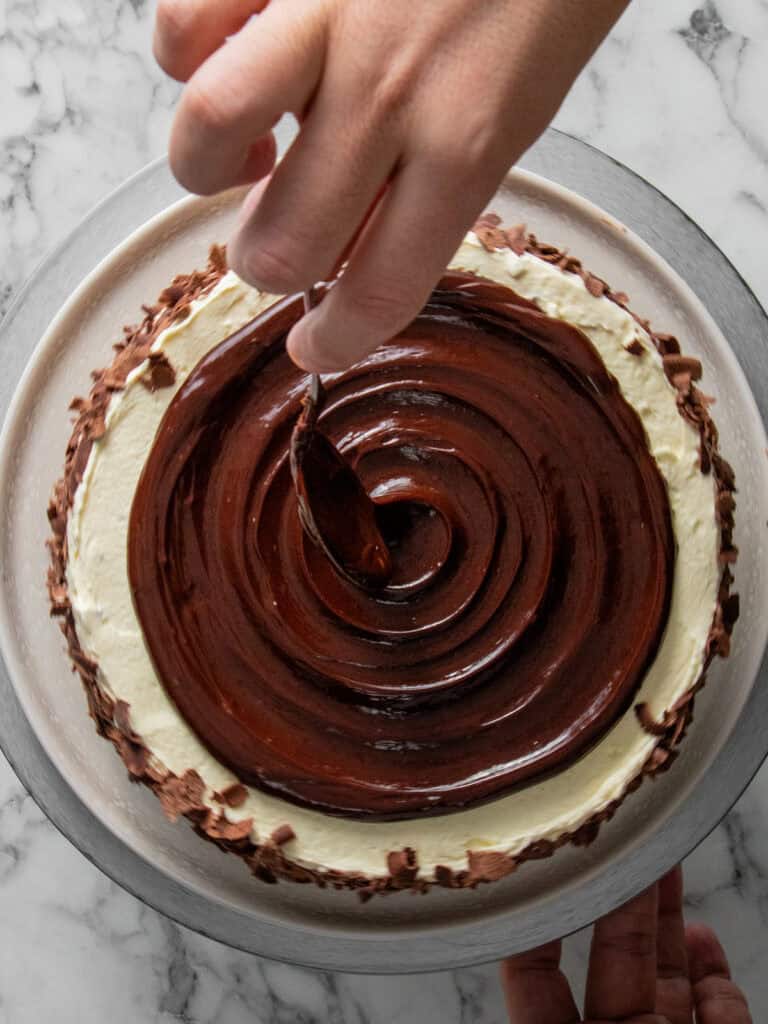
- Pipe a ring of cream on top to hold the chocolate sauce.
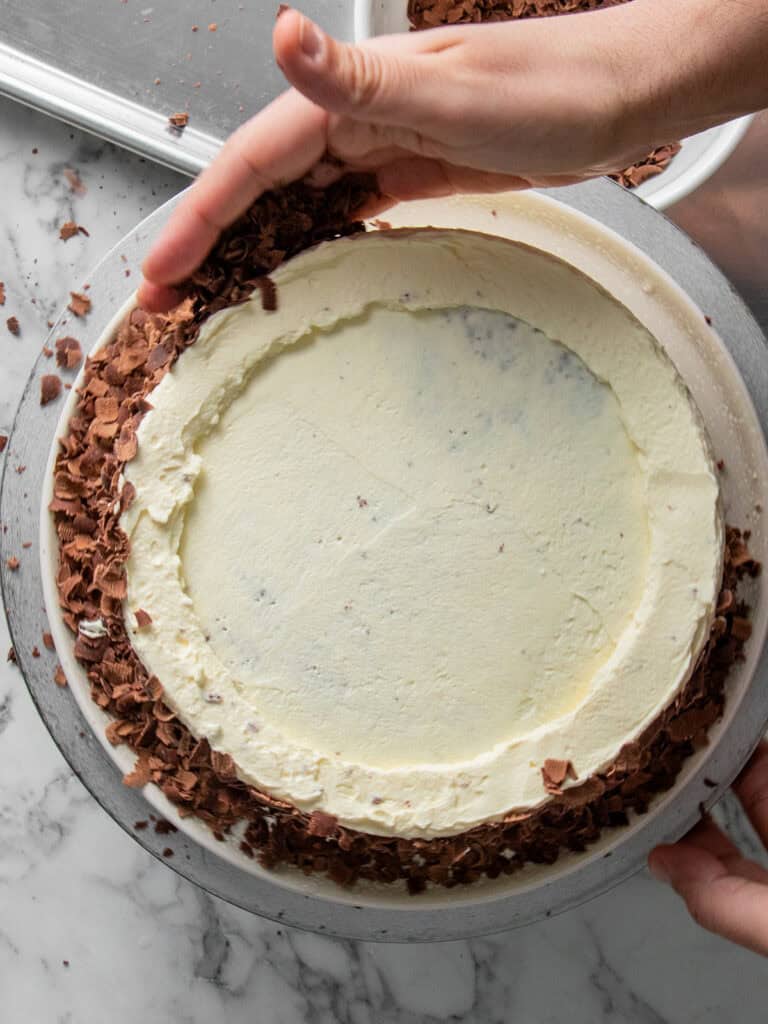
- Cover the sides of the cake with chocolate curls.
- Pour a thin layer of chocolate sauce on top of the cake. The perimeter of cream you piped will hold it in place.
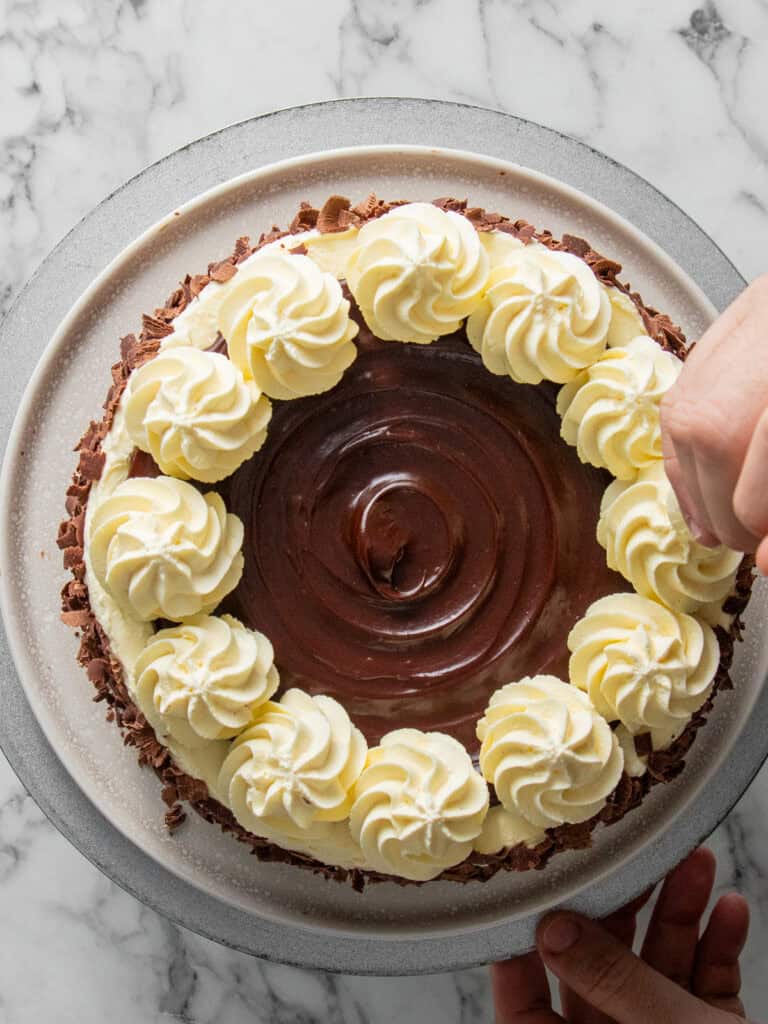
- Pipe swirls of Chantilly on top
- Decorate with fresh cherries or maraschino cherries.
Tip – Chill before serving – Chilling your cake in the fridge for 2-4 hours (overnight is even better) helps the cake hold its shape and frankly cold cake is nicer to eat when it doesn’t have buttercream.
A Quick Baking Guide
If you’re new to baking or just want to brush up on the basics, these guides are a great place to start!
- Tools and Equipment I Use as a Home Baker (and Love)
- Why is this recipe in grams? – why you’ll never go back to cups again!
- Commonly asked questions in the community
- How to properly soften butter
- Get to know your home oven for better baking results
Loved the recipe? Let me know!
If you enjoyed this recipe, leave a star rating and comment below. It helps others find the recipe and keeps the baking community growing. Tag me on Instagram so I can see your version too!

Moist Black Forest Cake with Luscious Cherry Filling
Serves 12
Print Recipe Pin Recipe
Ingredients
Cherry Filling
- 400 g jarred cherries in brine, not syrup, pitted and chopped (see notes)
- 300 g jar brine, divided in half (or water if using fresh cherries)
- 95 g corn starch, corn flour
- 315 g granulated sugar
- 1/2 lemon, juiced
- Pinch of salt
- 60 g kirsch, cherry liqueur
- 1 drop purple food gel, optional
- 2 drops red food gel, optional
Simple Syrup
- 125 g boiling water
- 105 g granulated sugar
- 40 g kirsch
Chocolate Sponge Cake
-
- 150 g all-purpose flour, plain flour
- 50 g Dutch processed cocoa powder, sifted
- 1/2 tsp baking powder
- 1/2 tsp salt
- 10 large eggs, 55g each, yolks and whites separated
- 1/2 tsp cream of tartar
- 210 g caster sugar, divided
- 60 g warm water, just above room temp
- 7 g vanilla extract
- 12 fresh cherries or maraschino cherries to decorate
Chantilly Cream
- 250 g heavy cream, cold (see notes)
- 1 tbsp vanilla bean paste or vanilla extract, see notes
- 250 g mascarpone, cold (see notes)
Decorations
-
- 200 g chocolate curls, see notes
- 1/2 batch Chocolate Sauce, room temperature
Instructions
Cherry Filling
-
Mix corn starch slurry – Drain half the cherry brine into a jug, and half into a a large non-stick pot. Add the corn starch into the brine with the jug and whisk until well combined. Set aside.
-
Prepare cherries and begin cooking – Roughly chop the cherries and add half of them to the non-stick pot along with all the sugar, lemon juice and salt. Stir continuously and bring to a boil on medium high heat. Then lower to medium heat and simmer for 3 minutes.
-
Finish cooking – Pour the slurry into the pot while continuously stirring. The mixture will be milky at first. Continue stirring until the mixture turns clear and thickens. Turn the heat off and add the remaining cherries and stir through to coat. Then add the kirsch and red food dye (optional) and stir to combine. Transfer to a heatproof bowl, cover with plastic wrap, making sure the plastic is on the surface of the sauce and set aside and allow to cool.
Simple Syrup
-
Add the sugar and water into a small saucepan and bring to a boil. Once the sugar is dissolved, take off the heat and add the kirsch. Mix and set aside to cool completely before using. About 20 minutes.
Chocolate Sponge Cake
-
-
Preheat your oven to 170C / 340F (fan off), 150C / 300F (fan on). Grease only the bottom (not sides) of two 20cm / 8-inch cake tins with cold butter and line the bottom with baking paper.
-
Combine dry ingredients – To a medium sized mixing bowl, whisk together the flour, cocoa powder, baking powder and salt. Set aside.
-
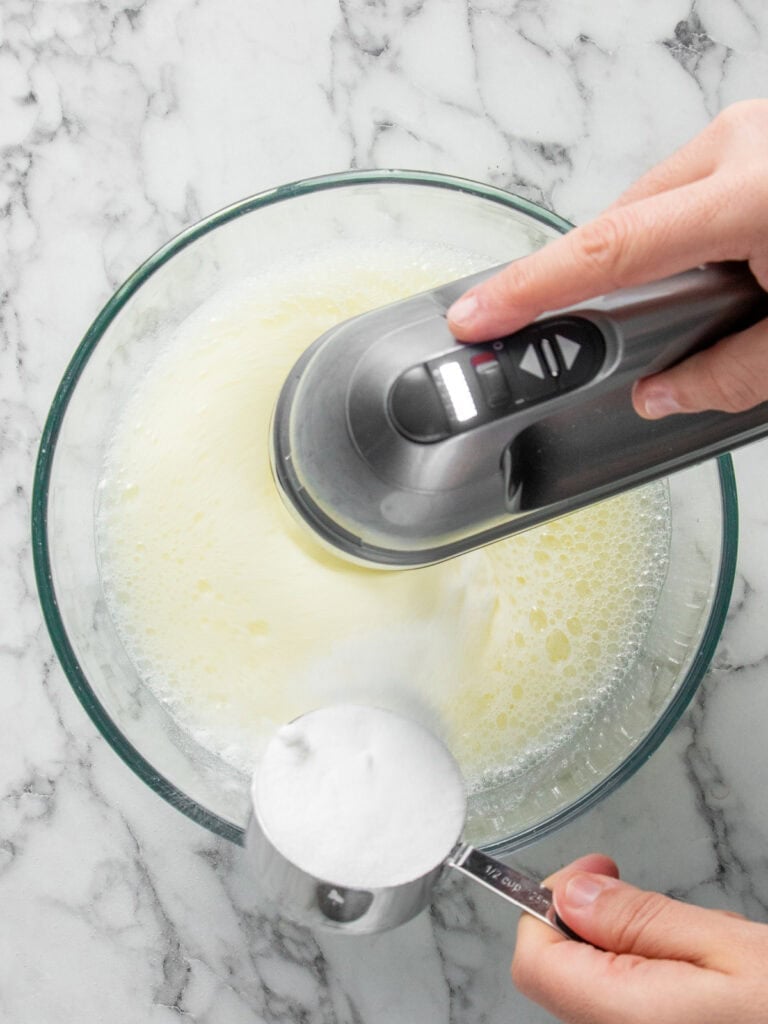
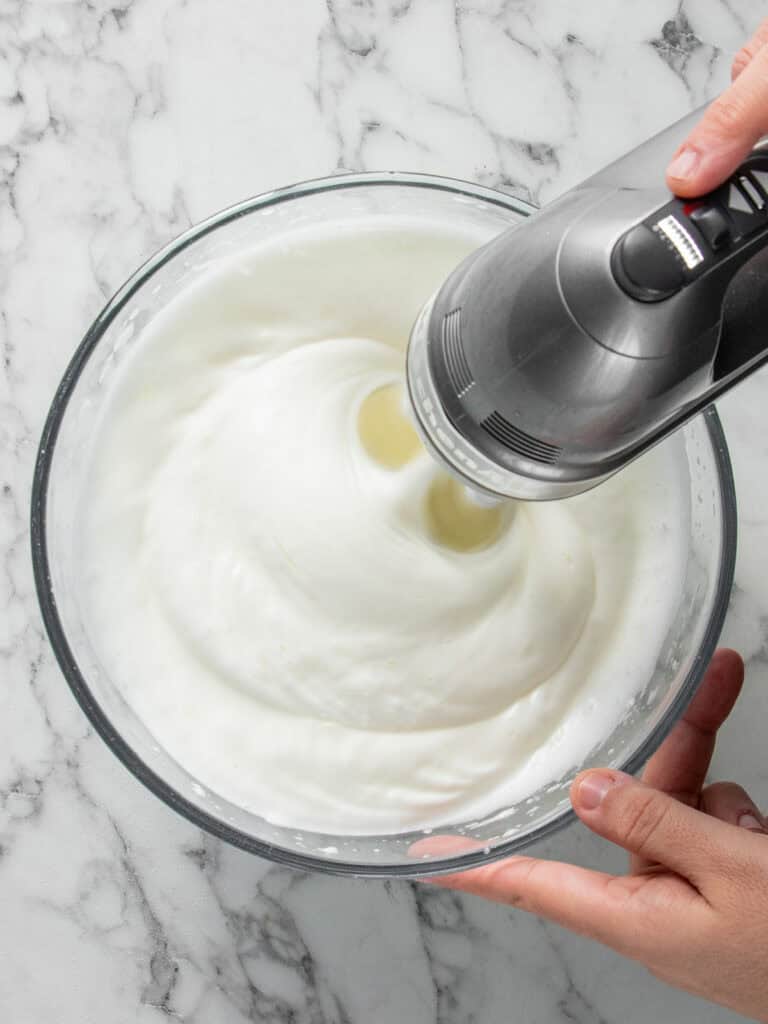
Whip egg whites – To a separate large bowl add the egg whites and cream of tartar. Use an electric hand beater to whisk until frothy. Slowly add 105g (half) of the sugar while the mixer is on high speed. Once all the sugar has been added continue mixing for 90 seconds. The mixture will thicken and become glossy. Take care not to overwhip the mixture otherwise it will result in large air bubbles in your cake.
-
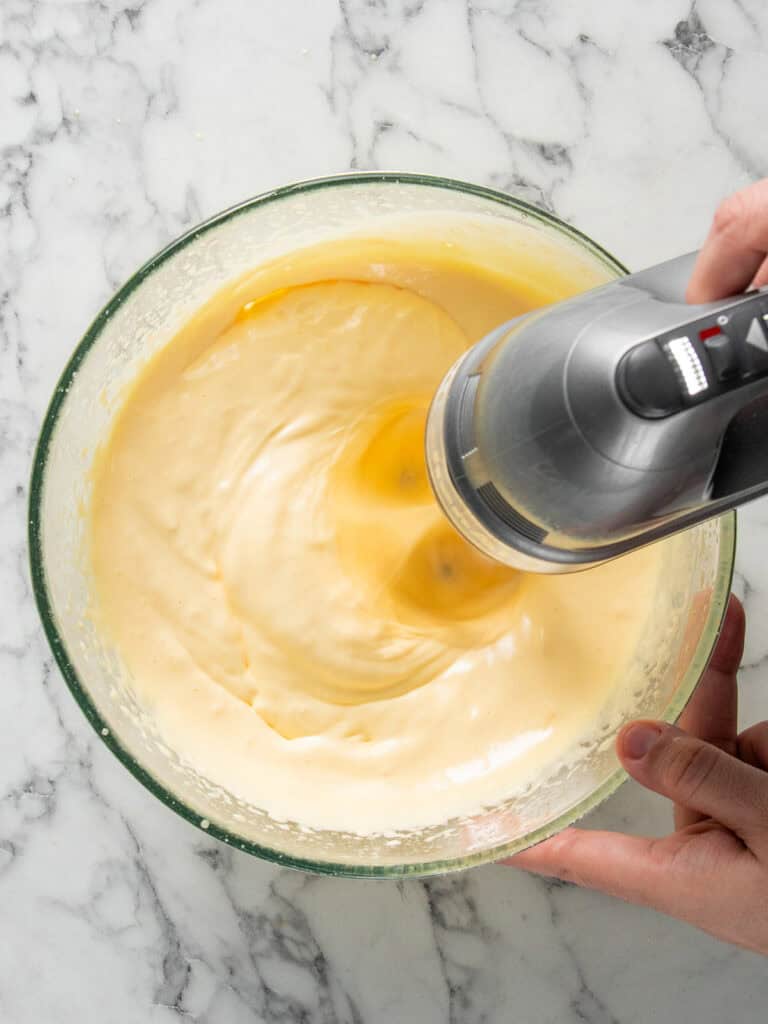
Whip the egg yolks – To a separate large bowl, add the egg yolks, remaining sugar, water, and vanilla extract and use your electric hand mixer to whip until pale, thickened, and creamy, about 5 minutes. The mixture should fall off in ribbons when you lift the beaters.
-
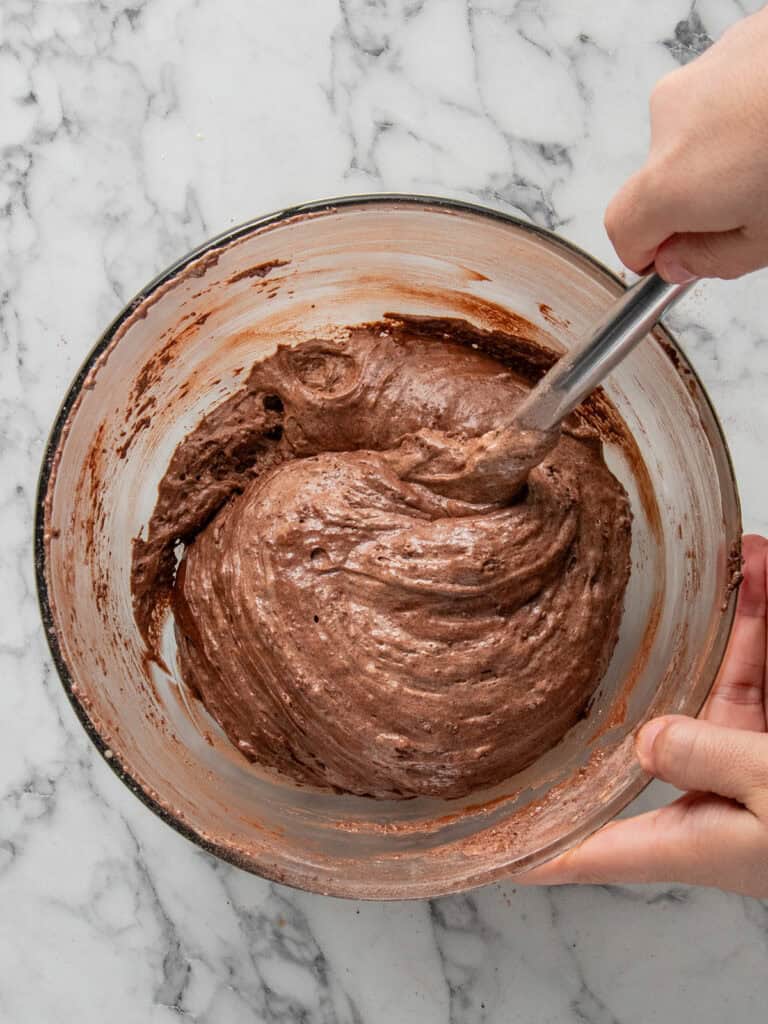
Fold in dry ingredients – Sift 1/3 of the dry ingredients into the egg yolk mixture and use a spatula to gently fold through. Then repeat with another 1/3 of the dry ingredients until all of it is combined. Take care not to overmix.
-
-
Fold in the meringue – Add half the meringue and gently fold through with a spatula. Then add the other half and repeat. The batter will be light and airy.
-
Bake – Divide the mixture between the two cake tins and bake in the middle rack of your oven for 30 minutes or until a toothpick inserted into the center comes out clean. Once baked, allow to cool in the tins for 10 minutes before carefully running a knife around the sides to release them. Transfer to a cooling rack to cool completely.
-
To trim cakes – Once the cake is completely cooled, trim each cake in half which will give you 4 layers of cake. I used a cake leveler, but a large, serrated knife will work as well. Discard or snack on excess cake. Set aside the cake layers and cover with a damp towel until ready to use.
Whipped Cream
-
-
Prepare mascarpone cheese – Add the mascarpone to a large mixing bowl (glass or metal) and use a spatula to stir and break up as some brands can be firmer than others. This helps break it up a little to prevent lumps in your whipped cream.
-
-
Whip remaining ingredients – Add the cold heavy cream and vanilla to the mascarpone. You can use an electric hand mixer or a stand mixer with a whisk attachment to whip to stiff peaks. I actually find it easier to get the right texture with a hand whisk. You’re aiming for a smooth, stiff whipped cream that holds its shape but still looks silky. If it looks split or grainy, it’s been overwhipped.
-
Transferring to piping bag – Add to a large piping bag fitted with a large open star tip. While you’re layering a decorating the cake, keep in mind that you will need to keep some of the cream to pipe swirls on top of the cake. So don’t go too heavy on the cream and use your best judgement to use it evenly.
Let’s layer and decorate!
-
-
Layer the cake – Place the first cake layer on your serving plate and brush it with simple syrup. Evenly spread about 1/4 cup of the Chantilly cream over the cake. Use the piping bag to pipe a tube of cream around the thin cream layer. This will act as a barrier to stop the cherry filling from spilling out the cake. Add 1/3 of the cooled cherry mixture and spread that evenly. Repeat this layering process with the remaining layers. Using a cake turntable and offset spatula makes the decorating process smoother.
-
Decorating the top – Once the cake is layered, spread a thin layer of cream on top and on the sides of the cake. Then pipe a tube of cream on top and fill with chocolate sauce.
-
-
Cover cake with cream – Coat the sides of the cake with cream. I do this by piping it on then spreading around with a spatula. You should have cream left over to pipe on top of the cake. Spread the cream around the sides of the cake as evenly as you can. Using an offset spatula is the best way to do this! Stick the chocolate shavings around the sides of the cake.
-
To finish – Pipe swirls of cream on top of the cake and add cherries on top each swirl.
Notes
Alcohol – You can leave it out if you like, I do. Or you can add an extra splash if you want to make it extra boozy!
Cream – make sure you use cream labelled heavy cream for this recipe. Whipping cream will work but won’t be as stiff as heavy cream. Low fat cream will not work.
Powdered sugar – I don’t like my cream too sweet, but if you like yours on the sweeter side you can use up to 1/2 cup. Make sure you sift it!
Mascarpone – is an Italian cheese that is similar in flavor to sour cream, but more creamy and less sour. Adding it to your Chantilly cream helps stabilize it so that it doesn’t melt as quickly and holds its shape on top of desserts. It even helps hold the air in the whipped cream until the next day! Opt in for a better brand one as they tend to be thicker and make sure it’s cold straight out of the fridge! Make sure you give your mascarpone cheese a mix before using. Some brands are soft, some are firm and can cause your Chantilly cream to go lumpy.
Vanilla – I have a great recipe for Vanilla extract here on the blog which is alcohol based. It can be used for most recipes. However, I would advise against using it for whipped creams (yes, even stabilized ones like this one) or meringues as it can muck around with the air whipped in the mixtures. Instead use a syrup based vanilla extract. I find vanilla bean paste is best.
Chocolate curls – For the chocolate shavings I used dark cooking chocolate. I have an awesome tutorial on the blog on how to make chocolate curls which takes minutes to make!
Storage – Cake layers (undecorated) can be wrapped tightly in plastic and stored in a cool, dark, dry place at room temperature for up to three days before using. The finished and decorated cake can be store in an airtight container, in the fridge for up to three days.
Nutrition – is an approximate and is based on per slice without the chocolate curls and chocolate sauce toping which are separate recipes. This cake makes 12 slices.
A note on measurements – This recipe uses weight measurements for the most accurate results. Cup measurements can vary depending on where you are, which affects the precision needed for a recipe like this. Here is where you can learn more about how to measure ingredients using digital kitchen scales.